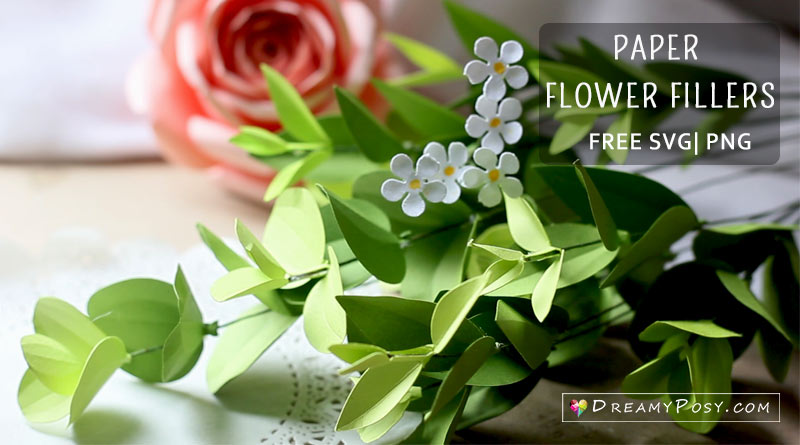
How to make paper flower fillers
Paper flower fillers are a great way to add dimension and interest to your paper flower arrangements, whether it’s a paper flower bouquet, a paper flower centerpiece, a paper flower boutonniere, or a bridal wrist corsage.
What are paper flower fillers and paper greenery?
Paper flower fillers are typically small, delicate flowers that are used to fill in empty spaces in an arrangement. They can also be used to add contrast and interest to the arrangement.
Paper greenery (including leaves, flowers, and even vines) is a type of artificial plant material that is made from paper. It can be made from a variety of materials, including cardstock, tissue paper, crepe paper, and even construction paper.
Why we need paper fillers?
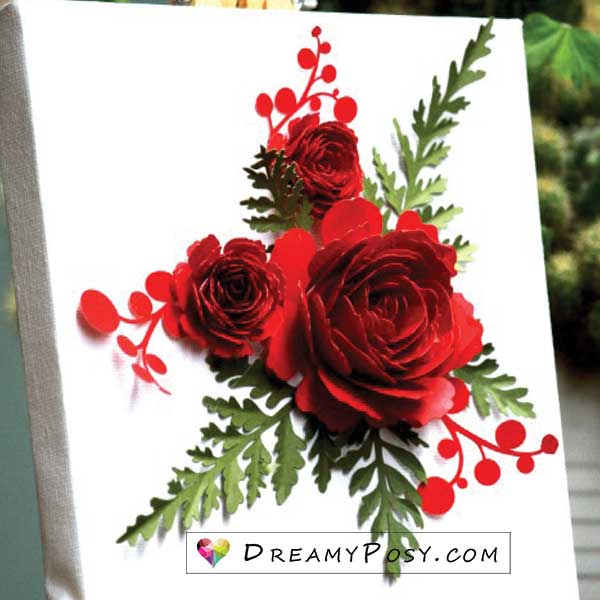
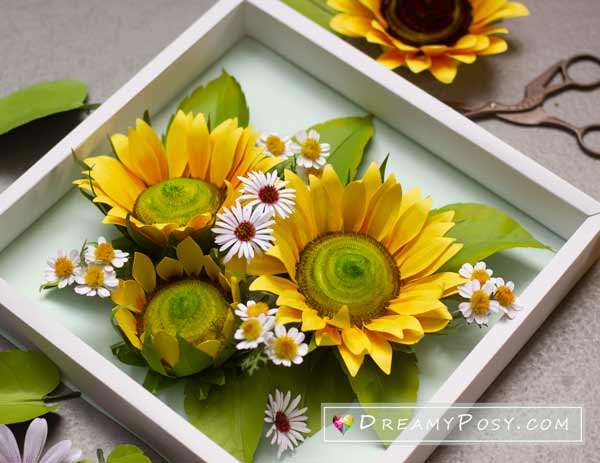
The beauty of your paper flowers can be even more enhanced when combined with paper fillers and paper greenery.
Paper fillers and greenery can also help to fill in empty spaces and create a more cohesive look. When used correctly, fillers and greenery can truly transform a flower arrangement from ordinary to extraordinary.
Here are some paper flower crafts we added paper fillers
 |  |
 | 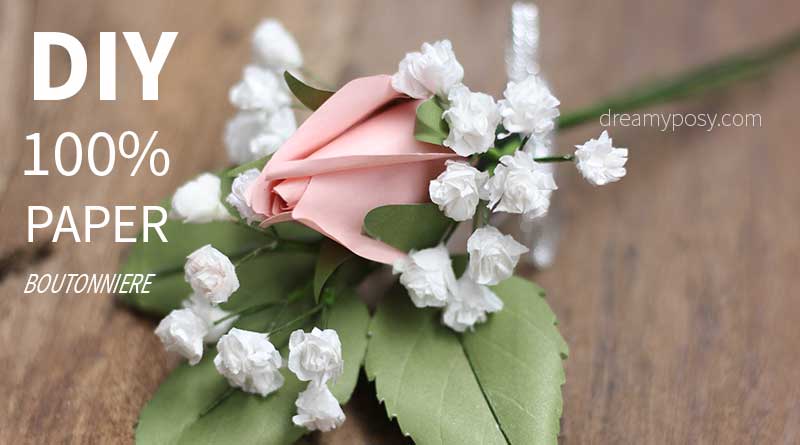 Paper Boutonniere tutorial and template Paper Boutonniere tutorial and template |
Video tutorial to make paper fillers/greenery
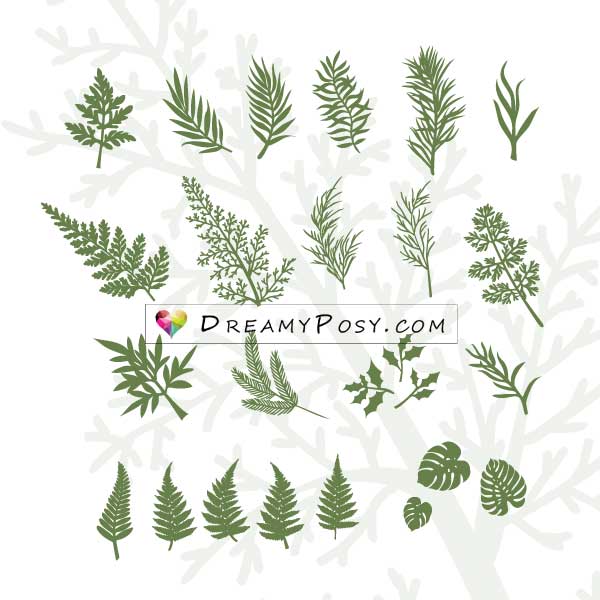
What are the most common paper fillers?
We have prepared the templates and tutorial for many small paper flowers and cute paper leaves that are perfect for the fillers below:
Paper Chamomile or Paper Feverfew
Paper daisies
Queen Ann’s lace
Many other ferns and leaves templates
How to make a your paper rose stem for paper bouquet?
We have shared this video tutorial and you will find how quick and simple way to add the stem to a paper rose.
Step-by-step instructions to make paper fillers.
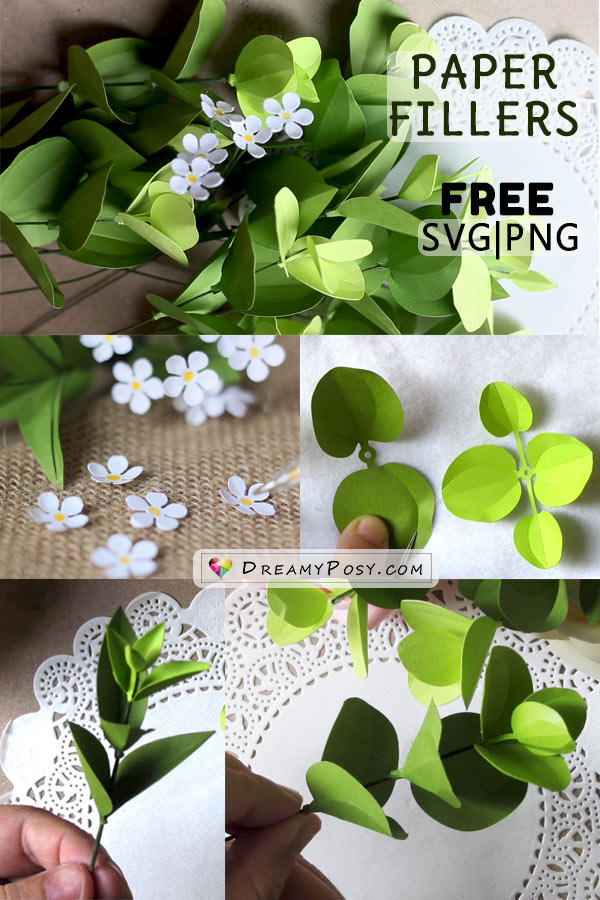
In this post, we will share with you the templates and tutorial to make paper myrtle leaves and paper eucalyptus leaves (baby blue eucalyptus leaves)
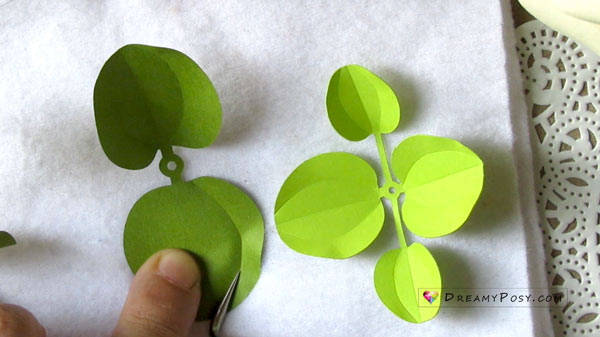
Step 1: Cut the flowers and leaves from my templates.
I would highly recommend you use a cutting machine to save your cutting time.
Cut the small leaves on lime green paper and the bigger leaves on green paper.
Cardstock 65 lb is recommended.
The size of leaves is depended on your flowers’ size, but the smallest leaf should be around 1,5″ in length.
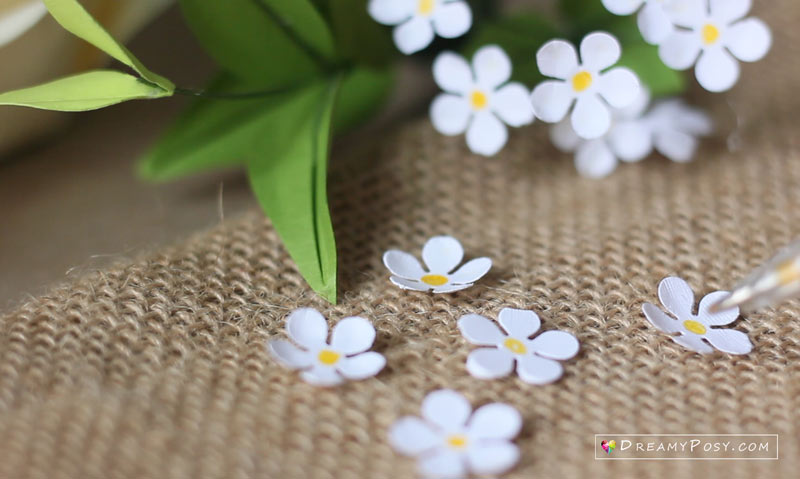
Step 2: Create the veins of the leaves and color the center for tiny flowers.
Please use a small-ball-head stylus to create the simple veins for the leaves, so that you can’t tear the paper out.
In the video, I use the Cricut weeding tool.
For the tiny flowers, just use a color pen (any kinds) to draw a small circle in the center of the flower.
I used a glitter ball pen.
Step 3: Glue the leaves and the flowers
Tacky glue will be better than a glue gun here, but I don’t have Tacky glue, so I just try to have just as little glue as I can.
For the leaves, glue around the floral wire gauge#24 and insert the lime-green leaves first.
Gently use your fingers to apply the smaller leaves to the head of the wire as the video showed.
Then insert the other 2 green leaves below. I use these fillers for a round bouquet, so I just need 3 layers of leaves only.
Please apply more layers if you want to use it for a cascade or other bouquet shapes.

For the tiny flowers, just make a small circle head on your floral wire so it could be glued with the flower easier. Use the floral tape to wrap 5 flowers together to make a small branch.
Step 4: Bend the wire to your design.
As the wire could be easily bent, the paper fillers could be arranged in a neat way or a wide free shape.
This is the rose paper flower bouquet I made 2 years ago, which you might want to refer to for applying these paper fillers.

PIN ME
Some tips for using paper fillers and greenery in your paper flower arrangements:
- Choose fillers and greenery that complement the flowers you are using.
- Use a color pallet in harmony the colors of your paper flowers, the paper fillers and the paper greenery
- Use a variety of sizes and shapes to create interest.
- Don’t be afraid to experiment!
Loves,
Ann.


I can’t create an account, can you give me directions?
Pls don’t create an account, just create new order, Rossella. Thanks.
Templates & Tutorials from dreamposy have been excellent as I am a beginner at 78 years old and finding a new interest. Thank you all so much.
Mary
Hi Mary,
I’m so happy that you are interested in my tutorials. To be an useful person is an amazing feeling, rite?
Loves,
Ann
ABSOLUTELY BREATH TAKING!!!!!
I am soo very impressed ……
FANTASTIC…..
JOB WELL DONE!!!!
I’m glad you love it, Cheryl. Thank you for leaving the comment.