2 ways to make easy Daisy and Chamomile paper flowers, SVG|DXF|PNG templates
Several years ago, I dedicated considerable time and effort to meticulously designing these Daisy and Chamomile paper flowers, aiming for the utmost realism.
While the tutorial I have provided is simple to follow, I am eager to enhance it further by offering an additional option for creating the center flower using cardstock. Additionally, I am excited to include a new photograph featuring significantly improved quality.
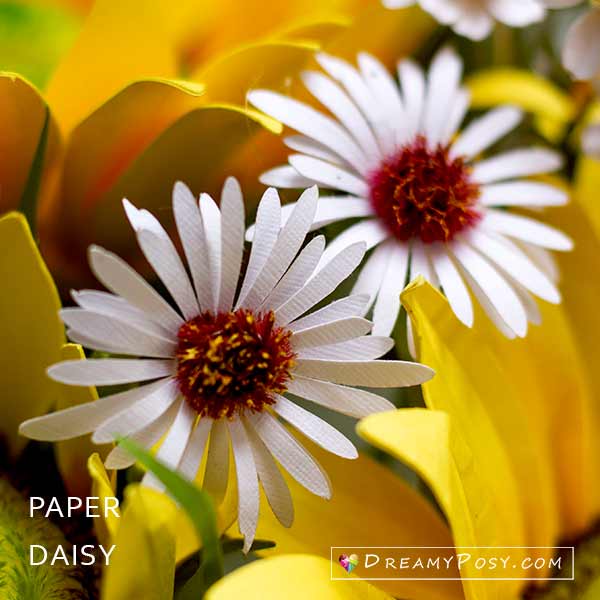
Having similar appearances, both paper Chamomile and paper Feverfew flowers hold a special place in my dad’s heart due to their rustic charm and pure, unadorned beauty.
What is the symbolism associated with giving a Chamomile paper flower to someone?
Contents
Giving a chamomile flower to someone can carry different meanings depending on the cultural and personal context. Here are a few common meanings associated with chamomile flowers:
- Calmness and Relaxation: Chamomile is often associated with its calming properties. Gifting chamomile flowers can symbolize a wish for the recipient to experience peace, tranquility, and relaxation in their life.
- Healing and Well-being: Chamomile has been traditionally used for its medicinal qualities and is associated with promoting overall well-being. Presenting chamomile flowers can convey wishes for the recipient’s health, healing, and vitality.
- Friendship and Support: Chamomile flowers are sometimes associated with friendship and supportive relationships. Offering chamomile to someone can express care, warmth, and a desire to be a source of comfort and companionship.
- Positive Energy and Positivity: Chamomile is often regarded as a flower that radiates positive energy. Giving chamomile flowers can symbolize the desire to bring positivity, optimism, and happiness into the recipient’s life.
The intrinsic beauty of Daisy and Chamomile paper flowers, coupled with my dad’s deep admiration for them, has motivated me to personally design and create these exquisite floral masterpieces.
Video tutorial to make Chamomile paper flowers
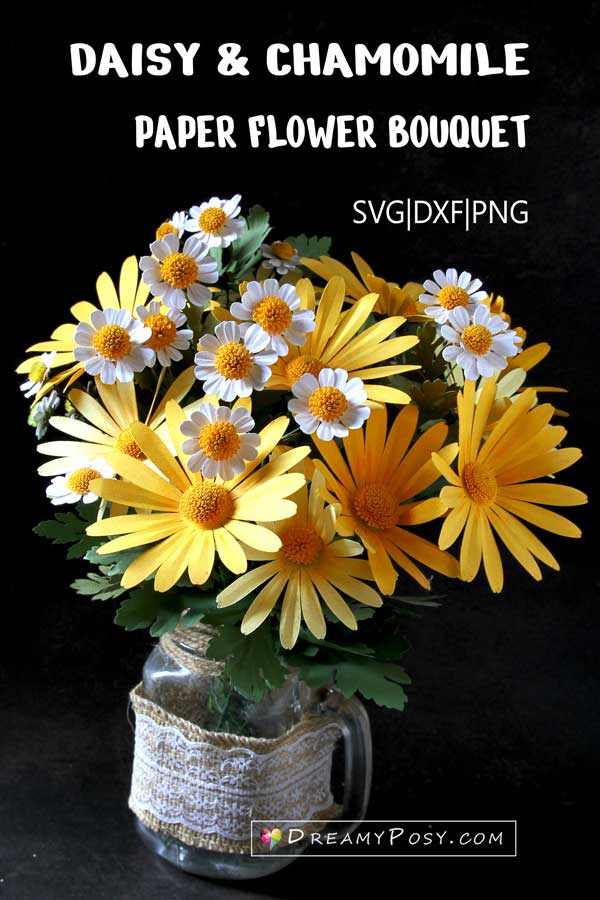
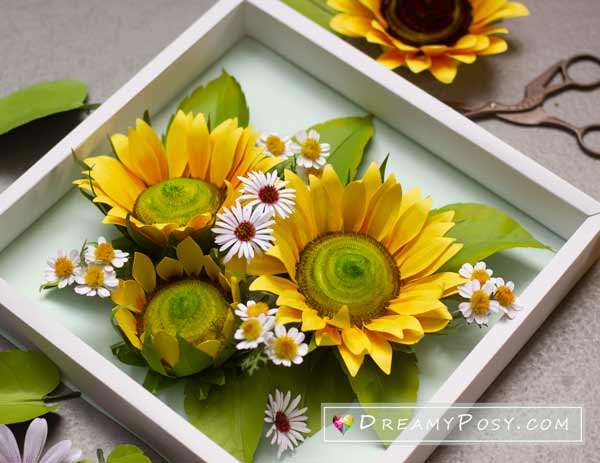
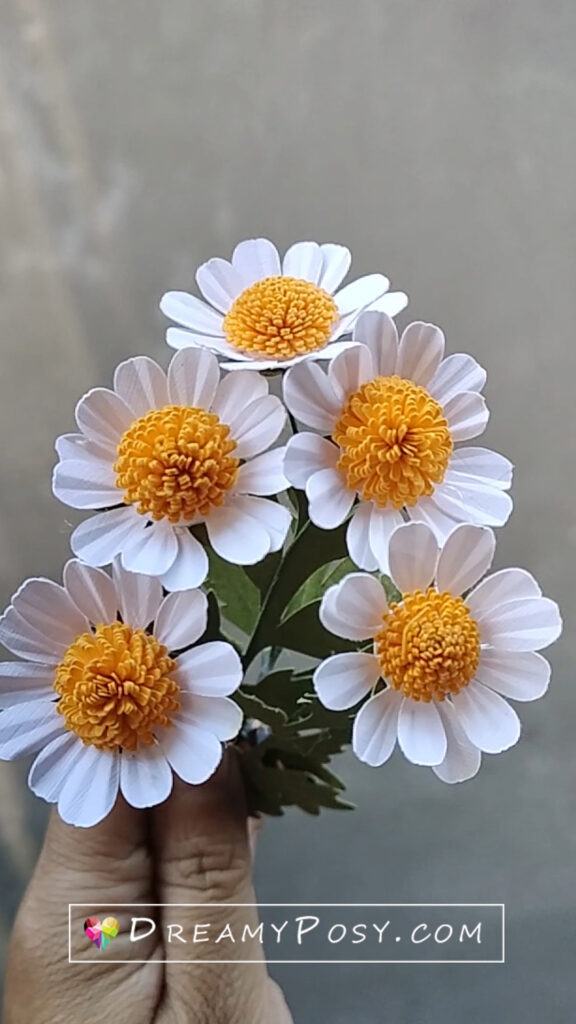
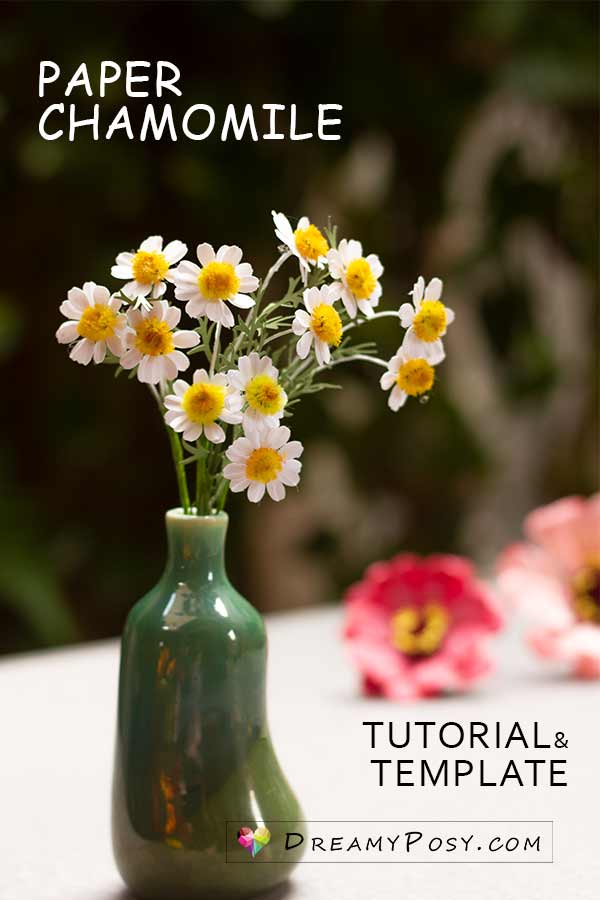
Paper Chamomile could be wrapped as a rustic paper flower bouquet like this
arranged as a wide vase
and add as cute flower fillers in a centerpieces.
Material needed to make the Chamomile paper flowers:
This post might contain affiliate links
- 65lbs cardstock (yellow, green)
- Cutting machine or scissors
- Pipe cleaner
- Acrylic paint
- Sponge daubers
- Craft awl
- Glue gun (the dripless one is recommended)
- Floral wires
- Floral tape
Step-by-step instructions to make the Chamomile paper flowers
Step 1: Cut the template
I made the Daisy and Chamomile paper flower bouquet above from this template set.
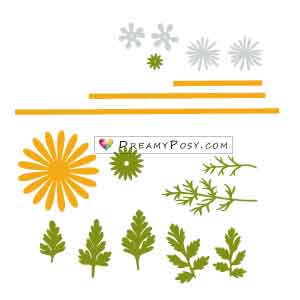
The digital template set is in SVG|DXF|PNG format, and includes:
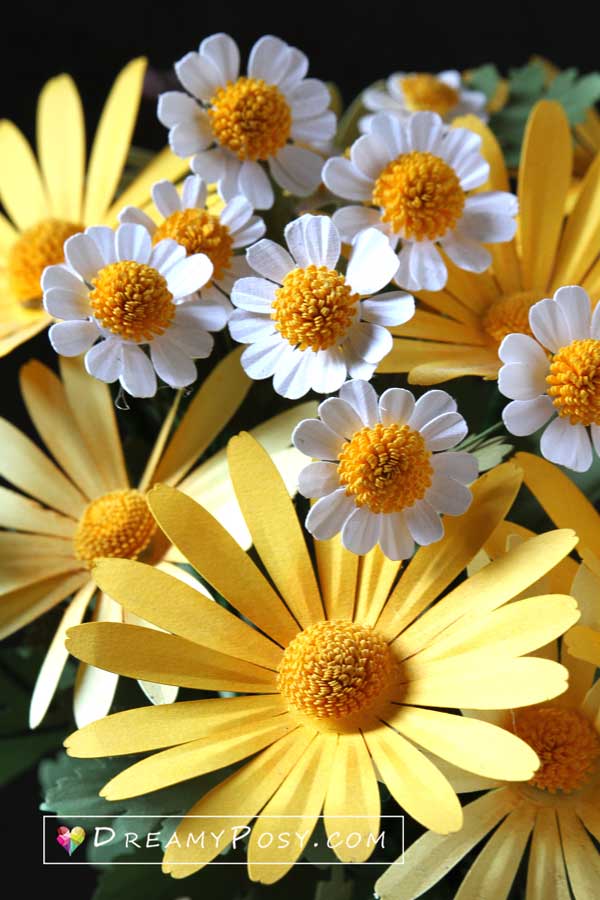
- The petals for paper Chamomile (2 layers)
- The petals for the paper tiny daisy (2 layers) – the one with burgundy centers
- The petals for the paper Daisy flower – the medium yellow daisy flower
- The leaves template for Chamomile
- The leaves template for Daisy
- The sepal for each flower.
As the flowers have too many petals and it’s hard to cut with scissors, I don’t make the PDF files.
To begin, simply upload the Chamomile SVG files to Cricut Design Space and proceed to customize the sizes according to your preferences. Avoid limiting yourself to a single size for each flower, as real flowers exhibit a wide range of sizes, shapes, and styles.
Step 2: Create the petals’ vein
In the past, I have closely guarded these tips for crafting realistic paper petal veins, reserving them exclusively for those who purchased my templates.
However, I have made the decision to generously share them with the paper crafting community as a small gift. While I have noticed instances where fellow paper florists have replicated my techniques in their tutorials without acknowledging my contribution, I choose to focus on the positive aspect—I am delighted that people are learning to create more exceptional paper flowers.
The technique involves utilizing a combination of tweezers and your fingers, which may appear deceptively simple, yet yields stunning results. For a clearer grasp of the process, I encourage you to refer to the accompanying video tutorial.
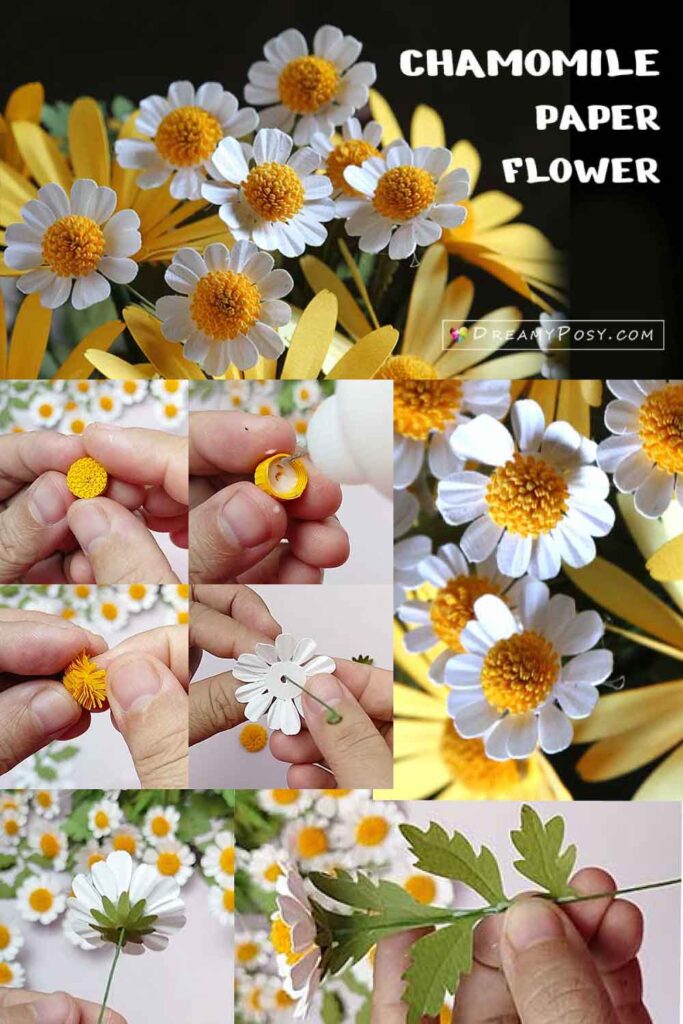
Step 3: Make the Chamomile flower centers
Previously, I used pipe cleaners to make the flower centers for these Chamomile and Daisy paper flowers as well as the paper Sunflower.
I took the burgundy pipe cleaner for the daisy and the yellow one and cover it with orange and a little green paint for the center of Chamomile. The paints could be acrylic, oil pastel, or felt pens…
Form the pipe cleaner into a round center.
But I updated with the new tutorial using cardstock for the flower center

The paper flower center technique draws inspiration from the art of paper quilling crafts. To create the center, simply roll a strip of paper tightly into a solid cylindrical shape, then place it on a quilling mold to achieve an expanded cylinder effect. Apply white glue to secure the shape and allow it to dry. Once dry, delicately separate the filaments using your fingers.
Step 4: Glue the flower
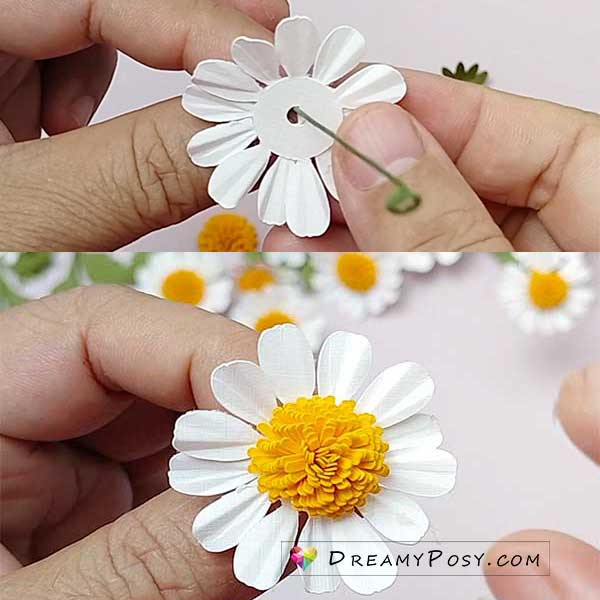
Ensure a secure bond by gluing the two layers of Chamomile petals together, being mindful to place them in an interleaved manner.
Form a rounded shape at the end of the floral wire and affix it to the petal layers of the flowers using hot glue. Lastly, attach the flower center by applying glue on top.
Step 5: Glue the stem
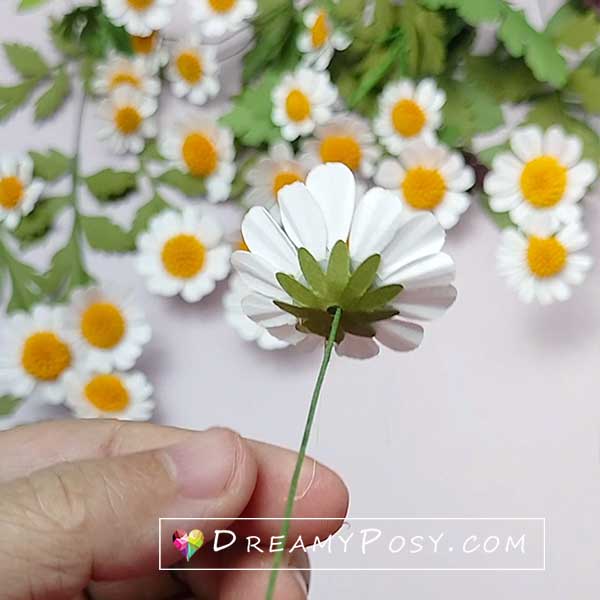
Securely attach the sepal to the bottom of the flower by inserting it and applying hot glue for a stronghold.
Step 6: Glue the leaf

PIN ME
Enjoys crafting,
Love you all,
Ann.