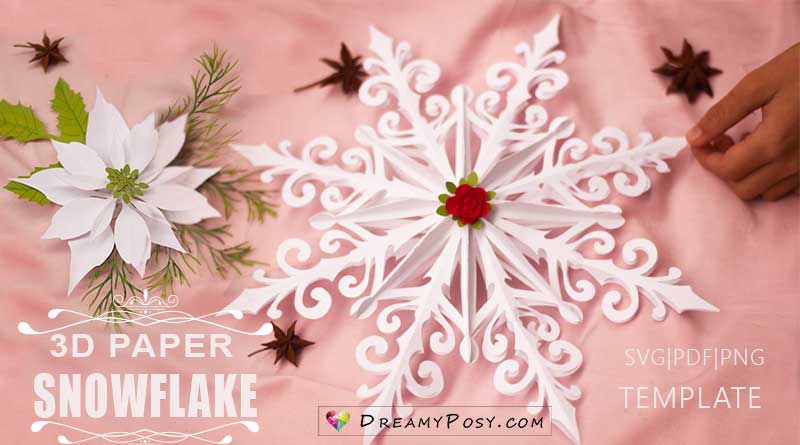
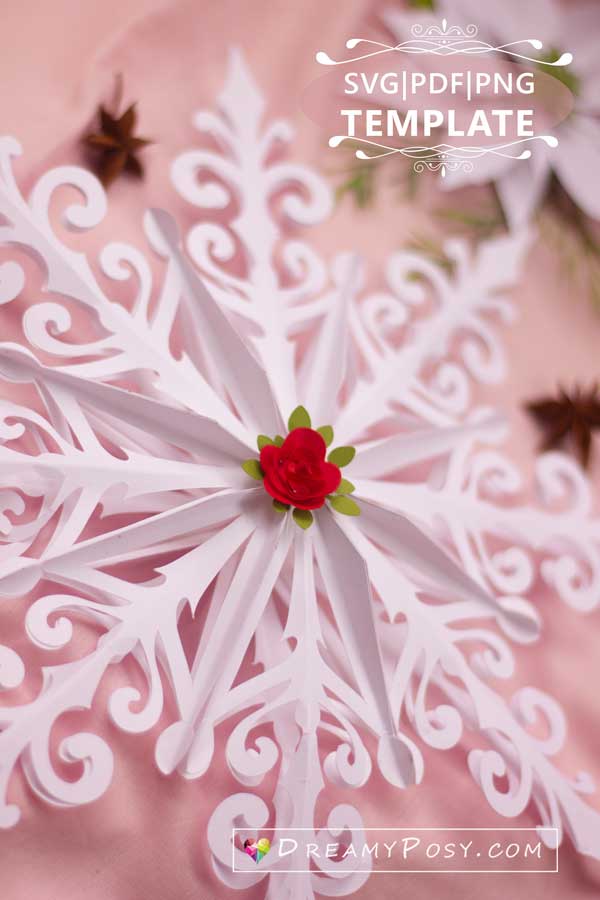
Easy 3D snowflake template and tutorial, giant and small sizes
Decorating your home with DIY crafts made from just a piece of paper and a pair of scissors can be a fun way to embrace the festive spirit of the Christmas holiday season. Our 3D snowflake template is one of our most beloved creations and is perfect for adding a touch of joy to our family’s Christmas decorations.
And we hope that making paper snowflakes is a great craft idea and an easy craft for yours, too.
Please scroll down to find all these easy paper snowflake pattern templates at the bottom of this post.
3D paper snowflake tutorial and templates
Contents
These beautiful snowflake designs have been launched for a few years and now I want to update this post with a new design as free paper snowflake templates.
My own designs were 8-pointed paper snowflakes, which means the petal has a smaller triangle than the 6-pointed paper snowflakes we’re going to share now.
You could use lightweight paper for the small ones, but it is heavy paper (200gsm or 70lbs) for the sturdy giant snowflakes.
Please follow these easy steps in the video tutorial below.
How to make 3D giant and small paper snowflakes, please follow these simple step by step:
1. Prepare the materials and tools:
- Paper: It’s very important to choose the right kind of paper thickness for your snowflake sizes. Check out this great brand here.
- For the giant snowflake in the pictures shown, we cut the template on full-size of A4 white paper 76lbs.
- But for smaller snowflake crafts, you can consider construction paper or regular paper.
- Scissors and craft knives for hand-cut or cutting machines like Cricut, Cameo, ScannCut
- Glue gun or white glue.
- A ruler to help fold the score lines.
- A string to hang the snowflake on
2. Cutting the templates
For hand-cut template:
- Please print out the pdf files of paper snowflake patterns. You can adjust the paper snowflake size you want by changing the printer setting.
- Use the sharp scissors to cut around the outer cut line and use the craft knife and cutting mat for the cut-out details inside.
- Tips: To have a smooth cut, please open the scissors’ blades as largest as you can, it means each cut will be as longest as it can).
- Use a ruler and an out-of-ink ball pen to score the dotted line before folding the snowflake template.
For cutting machine template:
- For these intricate cutting details, we would recommend using cutting machines. The template formats are in both SVG cut files – for cutting machines like Cricut, Brother ScannCut, and Silhouette (with Studio Designer Edition) and DXF cut files – for Silhouette Studio Basic Edition.
- For Cricut users, just upload the SVG file to the Design Space.
- The template has 2 layers: the cut layer and score layer.
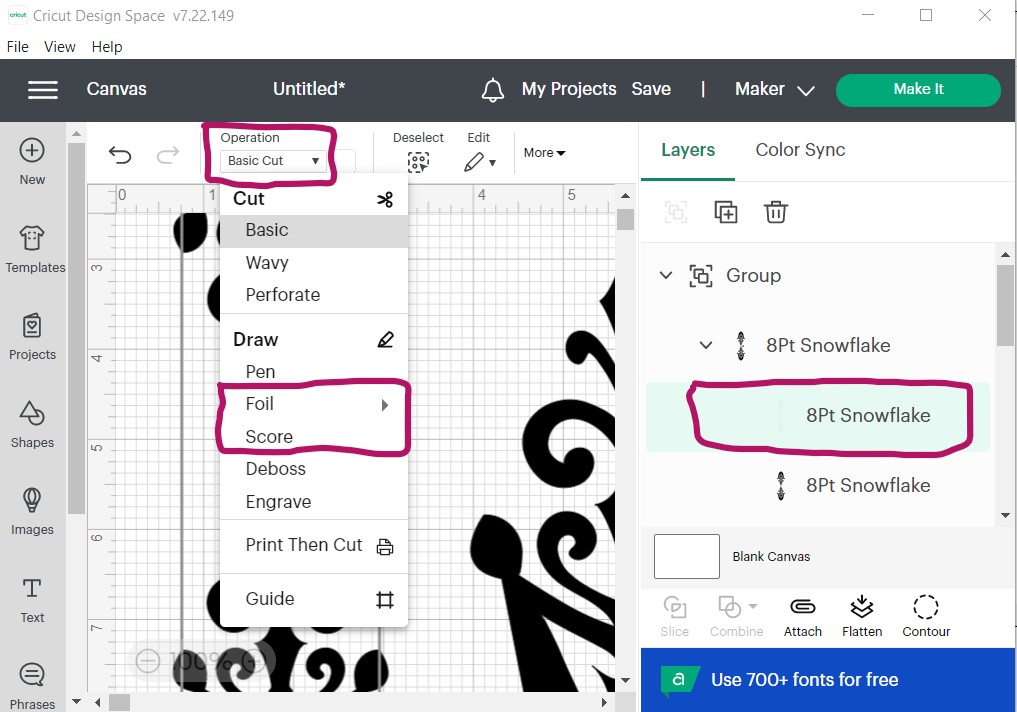
- Please chose the score layer first. In the Operation, choose the line to be scored or foiled (see picture)
- Choose both layers and click Attach button, so that they will be in the same position on the mat.
- Insert the scoring tool or foil tool before clicking the “Make It” button.
- My paper snowflakes templates have 8 points, so we will need to cut 16 templates for the giant snowflake, including 2 templates with holes to hang it on.
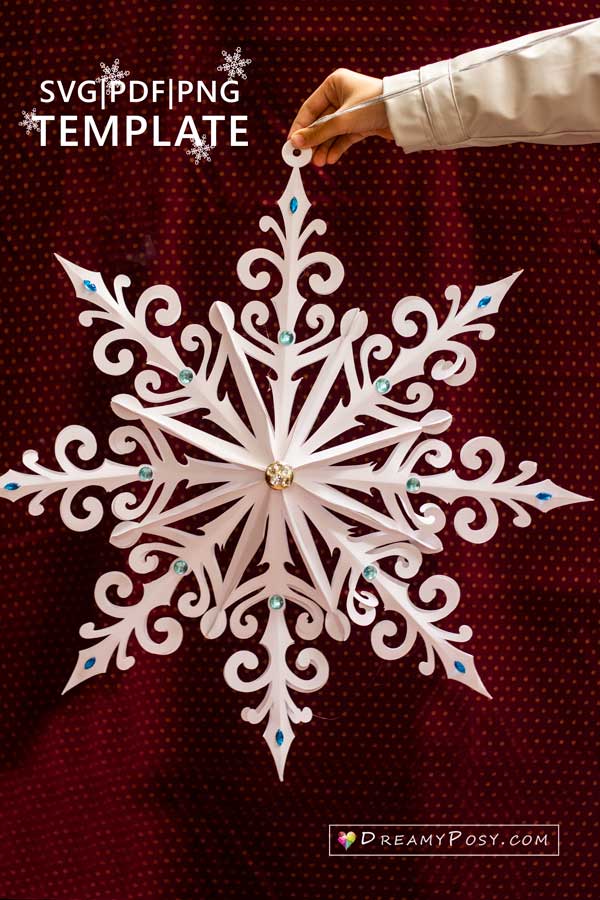
3D snowflake measurements:
- We cut the petal length of 11.5 inches, and the final size of the giant snowflake is about 21 inches.
- Please scale the template size on your printer setting or cutting machine’s software to have your favorite size.
Time to make a giant 3D snowflake:
- It took about 16 minutes for my Cricut to score and cut the giant petals.
- When the Cricut does its job, I fold the score lines during then.
- And we will have 10 more minutes to glue them all and have a perfect snowflake.
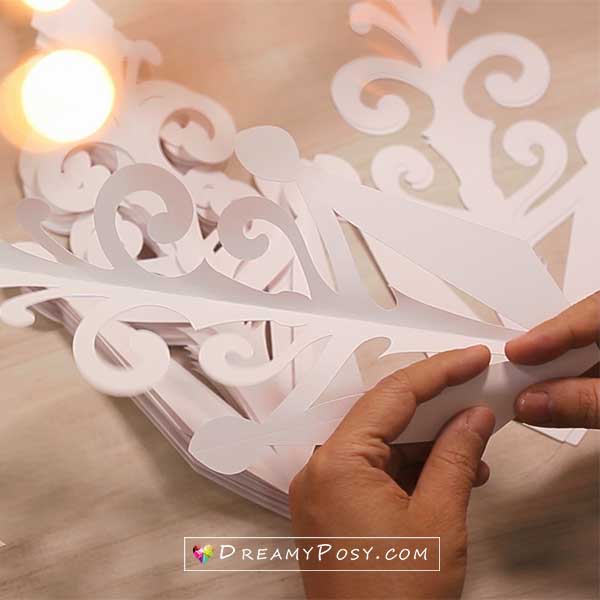
3. Glue the snowflake petals
- We used a glue gun for the giant snowflake and white glue for the small one.
- It takes just 10 minutes to glue all 16 snowflake petals together.
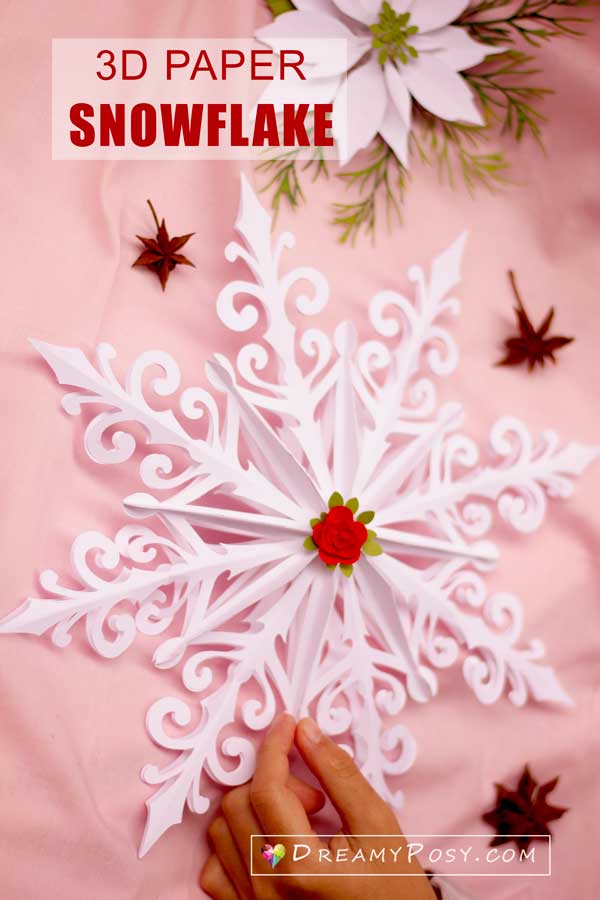
- Glue the center of the snowflake. We offer a small rolled rose template and small leaves pattern so that you could cover the center of the snowflake.
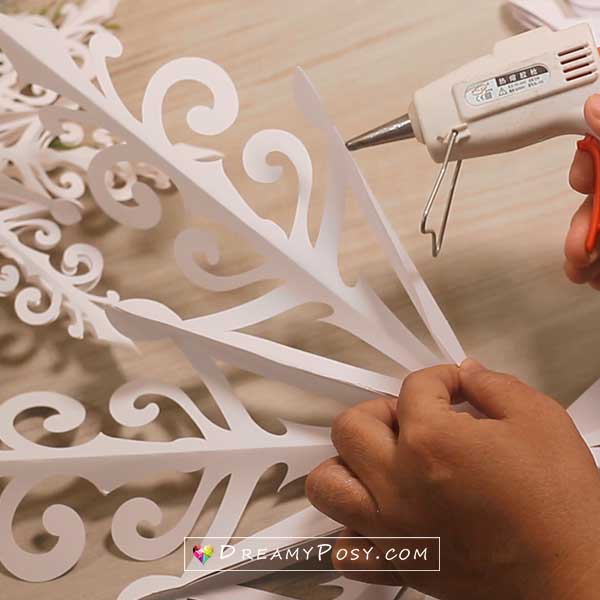
- Cut a strip of paper and rolled it into a 3″ height axle. Then insert the axle to connect the center of both sides of the snowflake together. This axle helps these extra-large snowflakes to be sturdy.
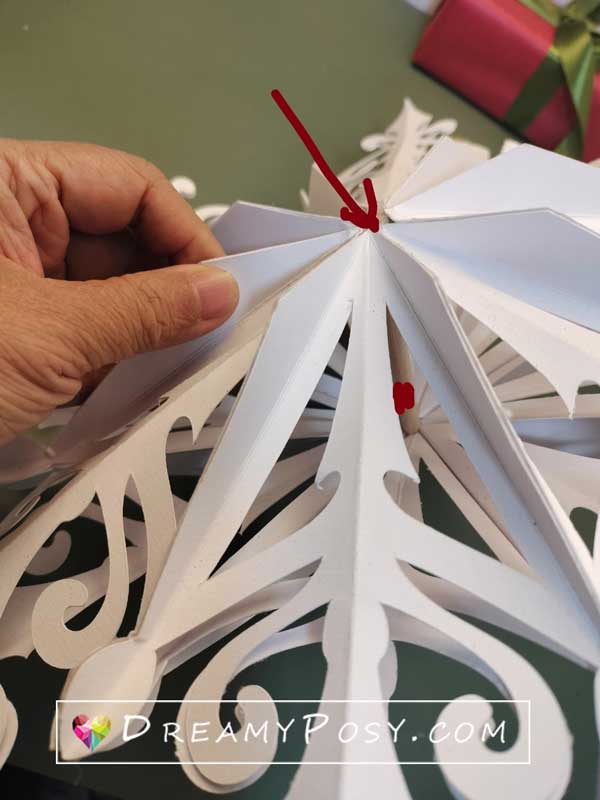
- Glue all the heads of the petals of 2 sides together, so we have 16 joining heads here.
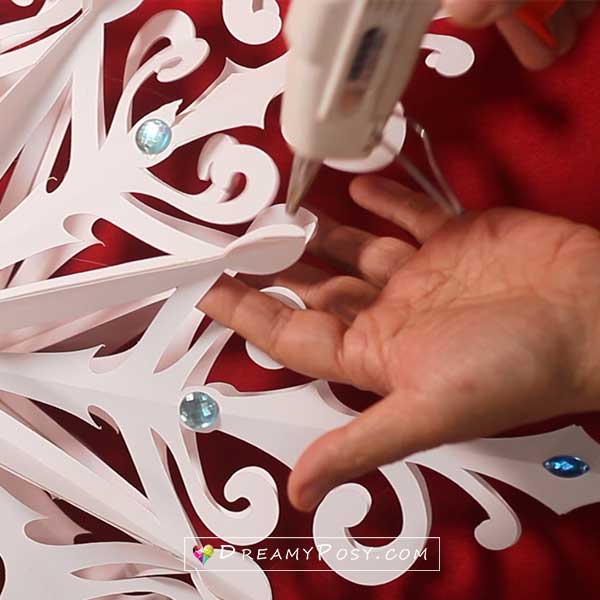
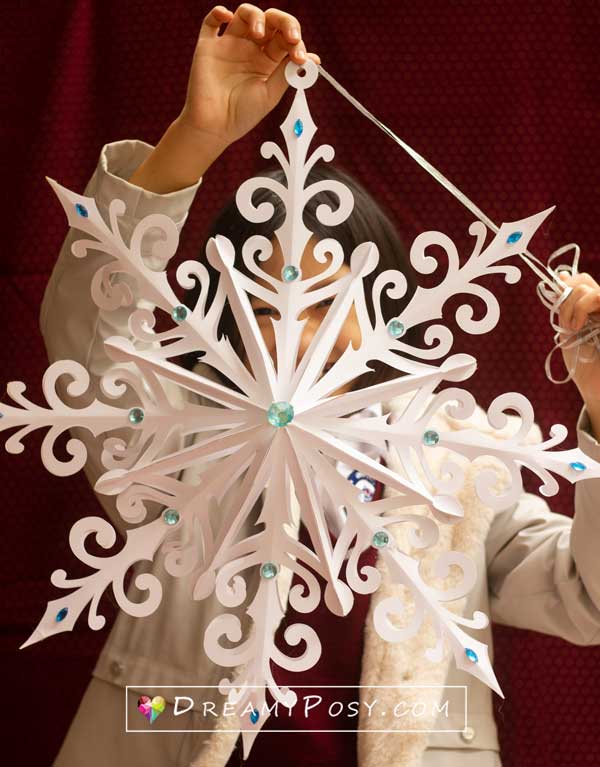
- Decor some sewing rhinestones if you want.
- Or insert the led light to light up your dream.
- Now you finished your unique paper snowflakes.
Video tutorial to make a 3-dimensional paper snowflake
I just put some green leaves (in my small poinsettia template) and red rolled rose on white snowflake.
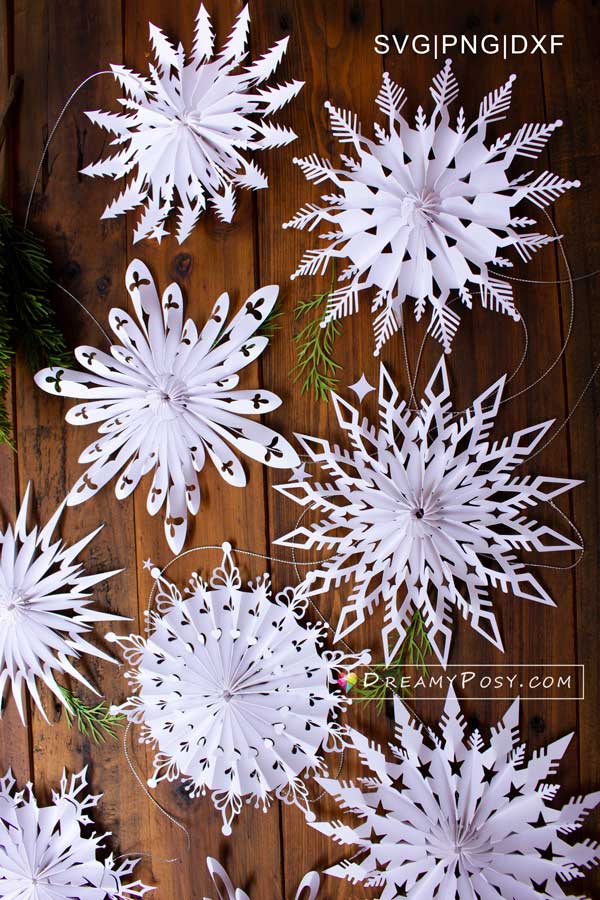
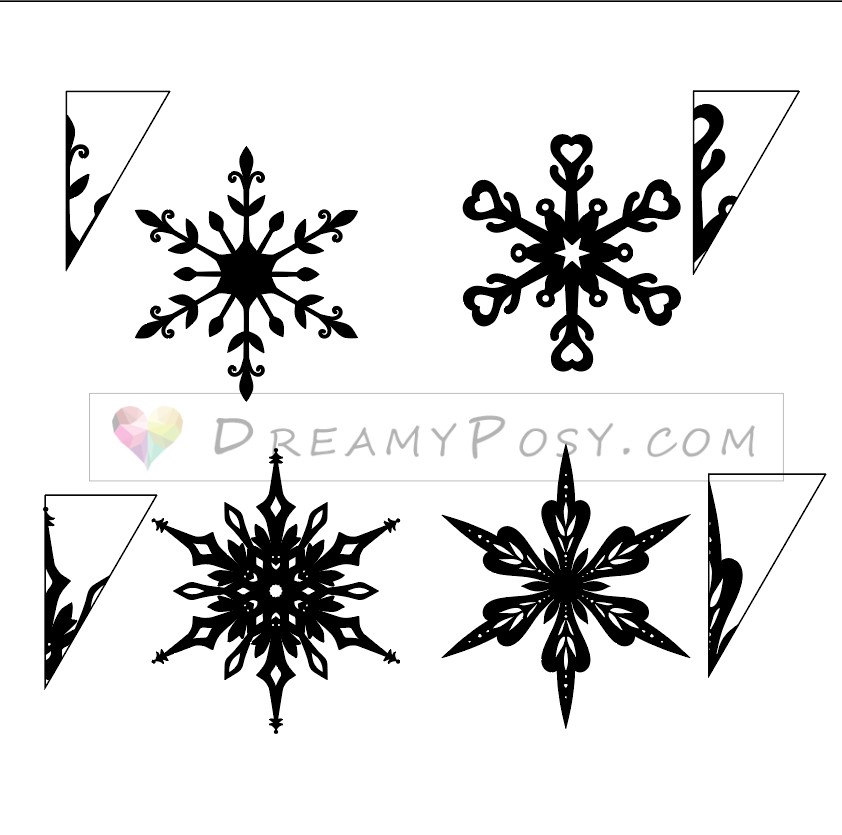
Here is my new paper snowflakes collection templates that you might like to make.
Simple steps to make 2D free printable snowflake templates.
This is my own snowflake design that you have never seen before. For personal use only.
For hand-cut snowflakes
Step 1: Cut a square piece of paper
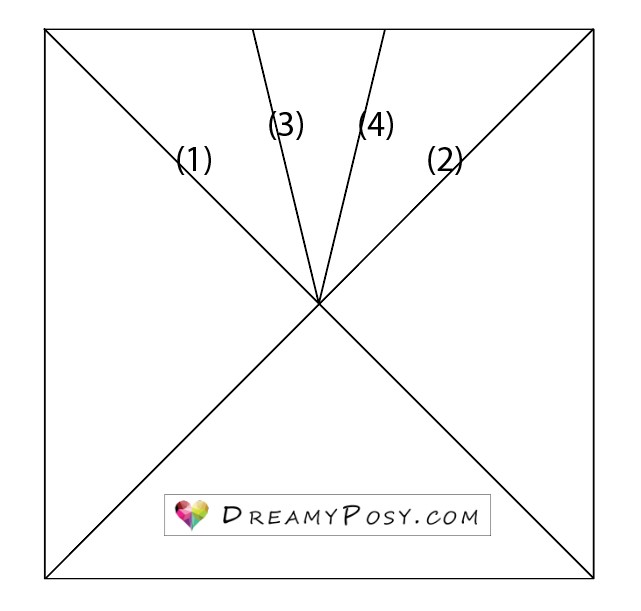
Step 2: Fold the square in half on line (1). Make sure to leave your lines on the outside of the fold
Step 3: Fold the new triangle in half on line (2) leaving your lines on the outside of the fold
Step 4: Fold the edge of your line (2) over to line (3) covering your lines as you go
Step 5: Fold the edge of your line (1) over to line (4)
You now should have a shape that resembles an arrow like a picture aside
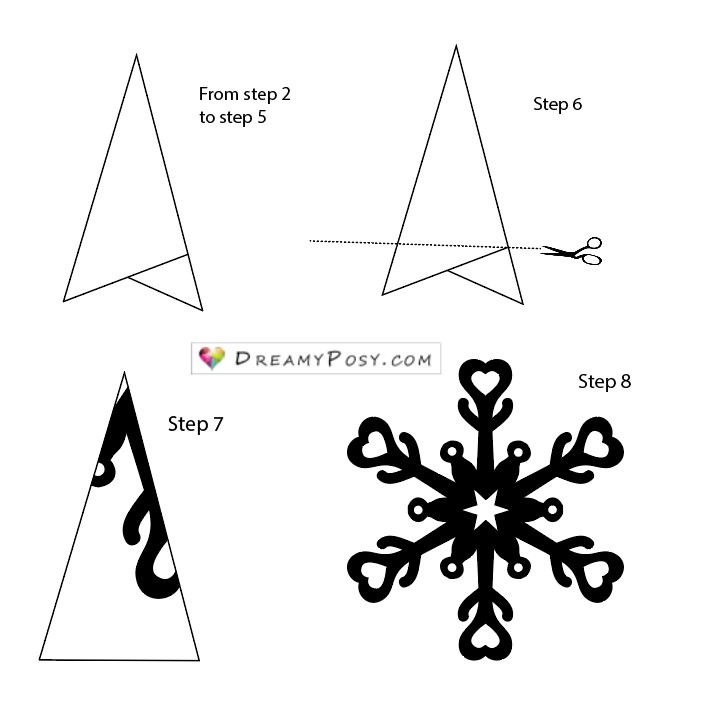
Step 6: Cut the two pointed ends of the arrow which will leave you a triangle
Step 7: Apply the free snowflake templates to the triangle (blank template) and trim the excess paper
Step 8: Open the paper and you got the finished snowflake.
For cutting machine snowflakes, please just upload the SVG/PNG files to your software and simply cut these beautiful snowflakes.
How to hang these beautiful paper snowflakes on to show it off.
Decide where you want to hang your paper snowflake. It could be on a wall, door, or window.
Clean the surface where you will be hanging the snowflake. This will ensure that the snowflake sticks properly and stays in place. For hanging on the window, wall, or door, you could use command stripes or mounting tape to minimize damage after removing it.
As the snowflake is white, cut a 40cm length of white thread/ribbon or transparent wire (fishing wire). The length might depend on your purpose, but it could be from 40cm to 100cm.
Tie the thread/wire to the hanging hole of the paper snowflake.
Hanging on the ceiling, I would recommend hanging it on your ceiling lamp.
For decor in your living room or your bedroom as a paper lantern, we use an E27 lamp holder and a led bulb light 5w like this picture.
If you want to hang the paper snowflake outdoors, consider using foam instead of paper.
Adjust the snowflake’s position if needed, and step back to admire your work. Your paper snowflake is now ready to add a festive touch to your home!
Merry Christmas,
Ann.
Notes: The 3D snowflake template set includes different sizes: small and giant snowflakes.
See more >> Paper stars template collection