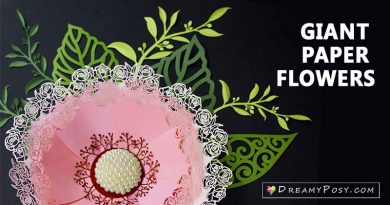
Paper flowers DIY, free template and step by step tutorial
Paper flowers DIY are beautiful and versatile craft activities that can be enjoyed by people of all ages. And paper flowers can be used to decorate your home, make gifts for friends and family, or even be used as part of a performance or display.
There are many different ways to make paper flowers, and the level of difficulty can vary depending on the type of flower you choose to make. Some simple flowers can be made with just a few basic materials, while more complex flowers may require more time and effort.
No matter what your skill level, there is sure to be a paper flower craft that is perfect for you.
Some of the benefits of paper flower making for mental health:
Contents
- 1 Some of the benefits of paper flower making for mental health:
- 2 Here are a few tips to get you started with making paper flowers:
- 3 Video tutorial for paper flowers DIY
- 4 Step-by-step tutorial for paper flowers DIY with pictures
- 4.1 Step 1: Upload this gerbera daisy SVG file and cut the templates on your cutting machine.
- 4.2 Step 2: Use the round stylus to form the flower centers
- 4.3 Step 3: Curve the flower petals
- 4.4 Step 4: Glue the flower layers together.
- 4.5 Step 5: Make the stem
- 4.6 Step 6: Make the leaves
- 4.7 Step 7: Make the buds
- 5 Materials needed to make this simple paper flower:
- Reduces stress and anxiety. The repetitive motion of making paper flowers can be very calming and soothing. It can help to take our minds off of our worries and focus on the present moment.
- Improves mood. The bright colors of paper flowers can be uplifting and energizing. They can help to improve our mood and make us feel happier.
- Increases creativity. Making paper flowers is a creative activity that can help to boost our creativity. It can help us to express ourselves and to find new ways to see the world.
- Provides a sense of accomplishment. When we finish making a paper flower, we feel a sense of accomplishment. This can boost our self-esteem and make us feel good about ourselves.
- Connects us with others. Making paper flowers can be a social activity. We can share our creations with friends and family, or we can sell them online. This can help us to connect with others and build relationships.
If you are looking for a way to improve your mental health, consider trying paper flower making. It is a simple, yet effective way to reduce stress, improve mood, boost creativity, and connect with others.
Here are a few tips to get you started with making paper flowers:
- Choose the right materials. The type of paper you use will affect the look and durability of your flowers. For example, cardstock paper is a good choice for making large, sturdy flowers, while tissue paper is a good choice for making delicate flowers. In each paper flower tutorial, we have suggested the best material for that flower’s shape and size. And we will recommend the paperweight in case you want to enlarge the flower size.
- Use a template. If you are new to making paper flowers, it can be helpful to use a template. This will help you to ensure that your flowers are symmetrical and evenly shaped. DreamyPosy has prepared so many templates and step-by-step tutorials to make paper flowers here.
- Be patient. Making paper flowers can take some time and practice. Don’t get discouraged if your first few flowers don’t turn out perfect. Just keep practicing and you will eventually get the hang of it.
Here are a few simple paper flower tutorials to get you started:
- Easy Paper Roses
- Paper Tulip
- Paper Orchid
For all of those mentioned, you could learn how to make paper flowers here.
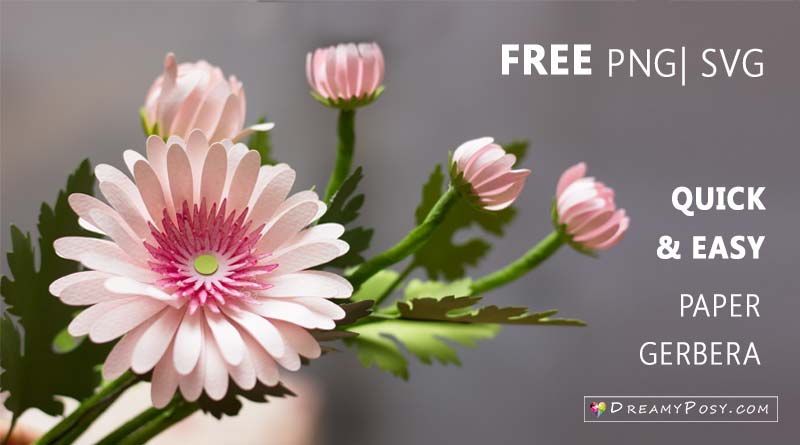
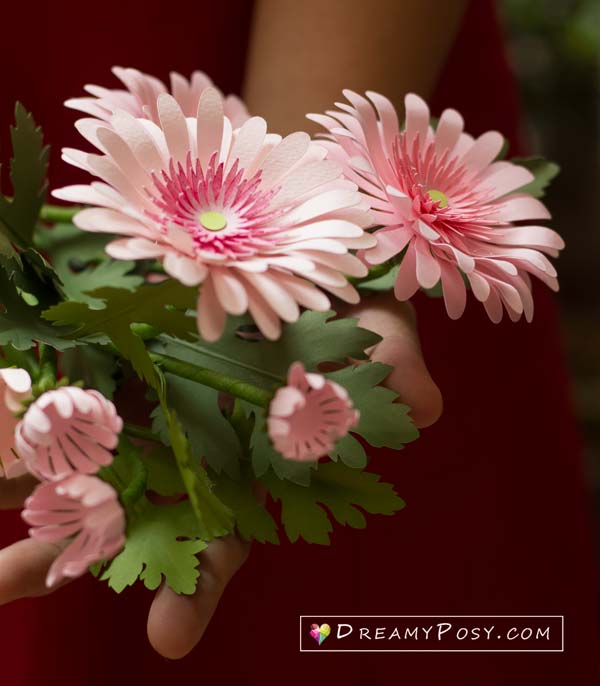
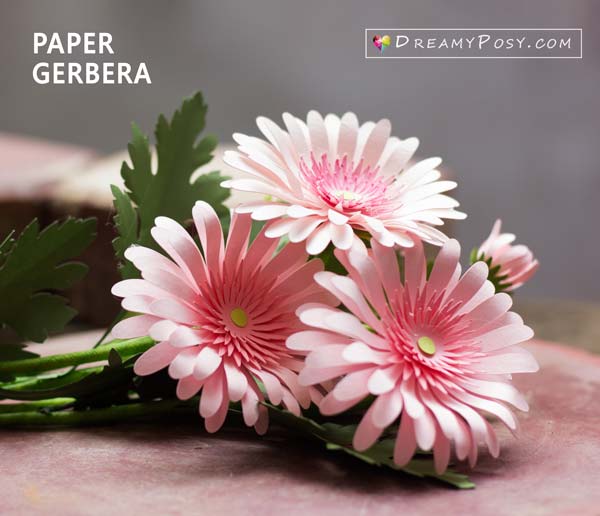
Today I would like to share with you this super easy tutorial to make daisy paper flowers with a Cricut.
We also offered free SVG daisy paper flower template, so you can try it right away, for your personal use only.
Video tutorial for paper flowers DIY
Step-by-step tutorial for paper flowers DIY with pictures
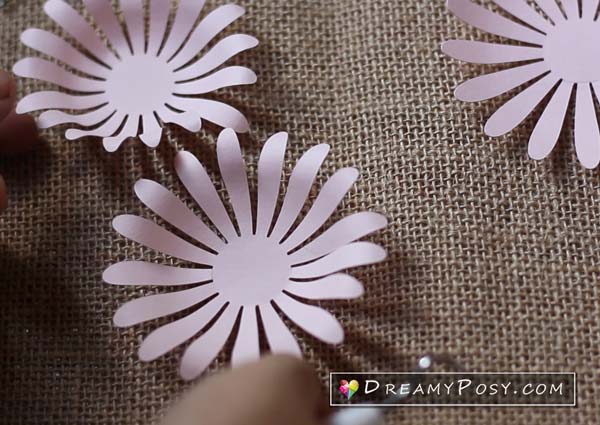
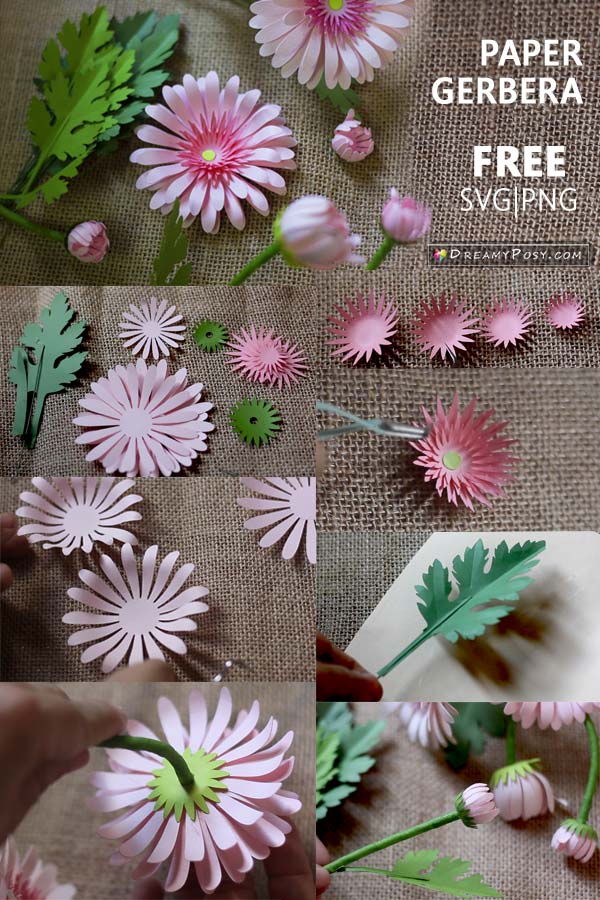
Step 1: Upload this gerbera daisy SVG file and cut the templates on your cutting machine.
Gerbera flower has a lot of petals and with the help of Cricut, the cutting lines are neat, and much quicker than hand cutting. Gerbera flowers have many petals, and cutting them by hand can be time-consuming and messy. However, using a Cricut machine makes the process much easier and faster. With the help of a Cricut, you can quickly and easily create a beautiful bouquet of gerbera flowers for your wedding day or any other occasion.
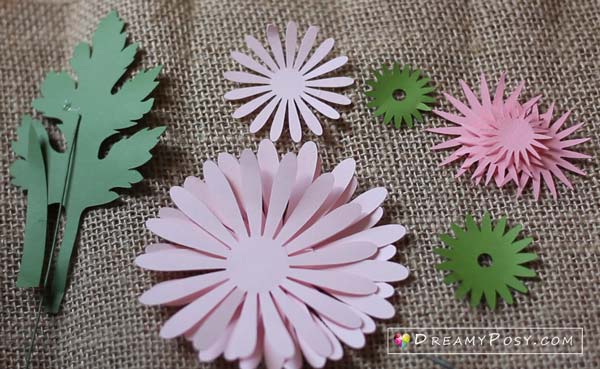
To make a paper gerbera daisy, you will need the following materials:
- 4 center flower layers
- 1 small petal layer
- 3 bigger petal layers
- 1 sepal layer
- Some leaves
All of these items are included in DreamyPosy’s free Gerbera daisy templates (see picture).
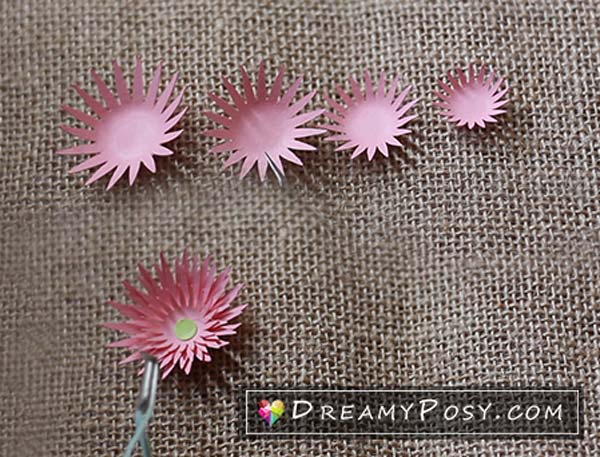
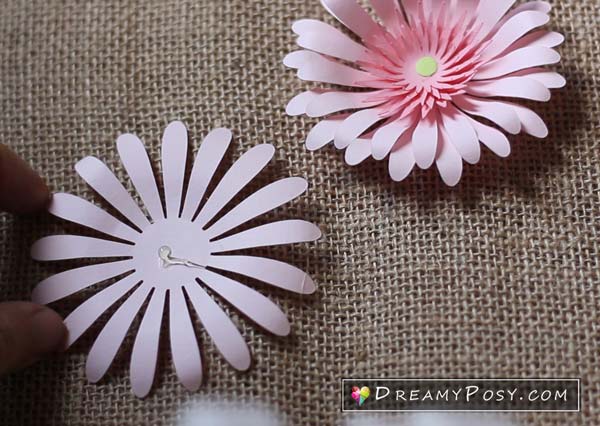
Step 2: Use the round stylus to form the flower centers
Use the ball stylus and a soft foam mat to form the 4 center flower layers before gluing them together like in the picture.
Please watch the video to have a clearer view of how to form them. Then glue it together accordingly.
Add a lime green tiny circle to the center of those layers.
Step 3: Curve the flower petals
Each layer will have its own curves.
The inner layer (which is a little smaller) will have strong curves while the outer one will have only light curves.
Step 4: Glue the flower layers together.
Use the hot glue gun to attach them together.
Try to rotate each layer to be interleaved the other layer’s space.
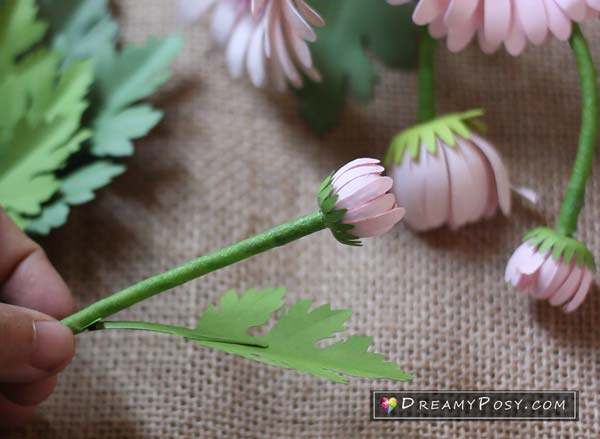
Step 5: Make the stem
Attach the wire head (which is inserted into the PVC transparent tube) to the bottom of the flower.
Then cover it with the sepal.
Wrap the stem with floral tape.

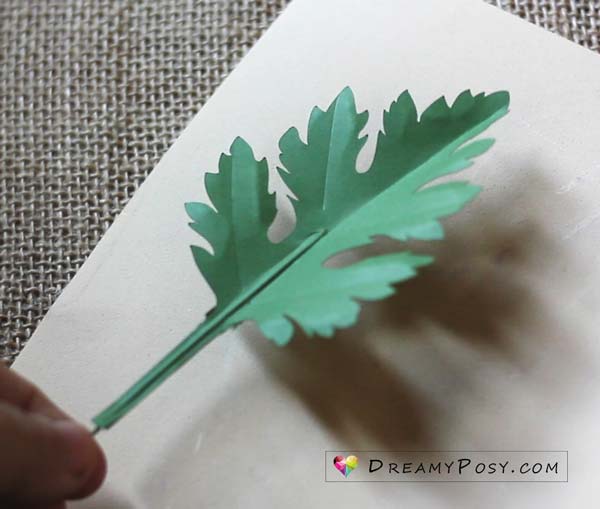
Step 6: Make the leaves
Attach the wire to the leaf with white glue and cover it with a small piece of paper.
Use your nail to create the vein of the wire on both sides.
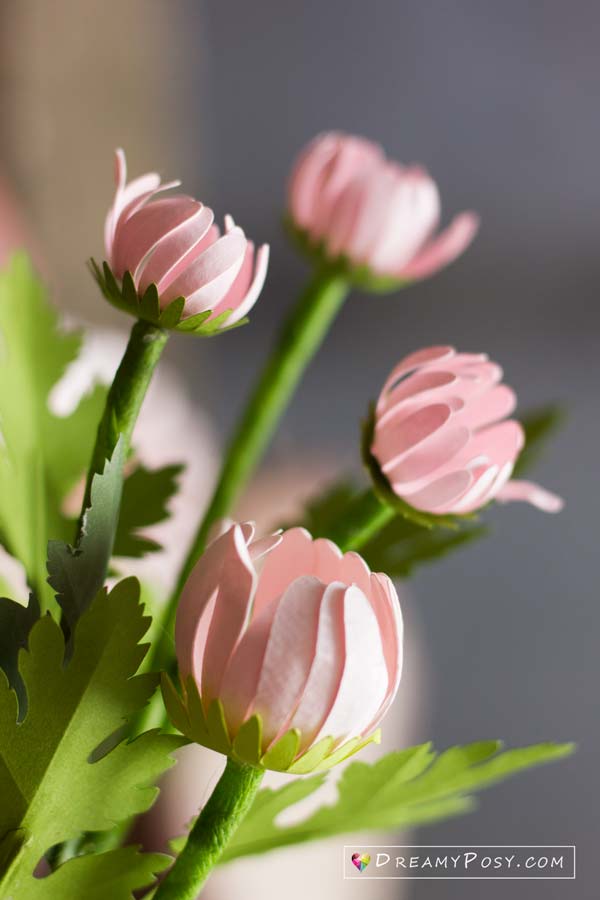
Step 7: Make the buds
Use the ball stylus to curve the bud petals. and sepal.
Attach the stem to make the flower bud.
That’s all, this should be the easy flower that you surely can make it.
***** PIN ME ****
Materials needed to make this simple paper flower:
(This post might contain affiliate links)
2. Scissors or a Cricut Explorer for much faster cutting.
3. Round stylus
4. Glue gun and white glue
5. Floral wires (gauge#24 for the leaves and gauge#20 for the flowers)
6. PVC transperant tube 3mm
7. Floral tape
( DO NOT SHARE my templates directly. I earn my living from the ads on my blog. So please refer my blog link to your friend to get my free templates.)
Template for personal use only, For commercial use, please buy our commercial license on my shop.
Thank you and with lots of love,
Ann.

Thank you so much! If I master this I will be back to buy some of the others you have.
Oh thank you, Maggie. I’m happy to hear so.
They are pretty!!! What size ball stylus did you use?
It depends on the petal size and the curves you want to form, dear. Thank you.
What did you use for the center of the daisy?
Hi Derek, just a small paper circle, pls see the video for clearer view. Thanks.
Merci de partager votre savoir c,est très apprécié et c’est très beaux merci
Merci de partager votre savoir c,est très apprécié et c’est très beaux merci
Amazingly Beautiful!! How do I download the file? Thank you for sharing.
Pls find the download link at the end of the material list. Thanks Evy
Thank you for your beautiful flowers and a big thank you for sharing your talents!
Thanks Judy for your nice words
Thank you for the free templates and tutorials. Your flowers are beautiful!
Thank you, Kathleen
I’m very excited to try my first paper craft. I have a circuit machine. Your flowers are beautiful. Thank you for sharing this for free.
Glad to hear so, Patricia.
Thanks
I’m glad you like it. Thanks.
Beautiful! I’m going to try it, never have made flowers. If it works, I’ll be using it for a wedding. Thank you.
Can’t wait to see your flowers, please share with me, Susan.
I have a question. When you put the large flower together do you cut 2 sets of large petals or three? The svg only has two but the photo tutorial shows three. Thanks.
Dear Joy, the large flower has 3 layers of petals, and the top layer will be the smaller one, the other 2 layers will have same size. Hope this help.
Thank yo for this great template and tutorial. I’m glad I found you. Anxious to see more!
You are welcome, Nancy 🙂
Thank you!
I’m happy that you like this 🙂