
How to make paper Peony from printer paper, FREE template
Welcome to DreamyPosy’s tutorial on how to make a paper peony! Peonies are beautiful flowers that are known for their large, fluffy petals and brilliant beauty. They are a popular choice for floral arrangements and bouquets. In this tutorial, you will learn how to make a realistic paper peony that can be used for decoration or as a gift.

To make a paper peony, you will need the following materials:
This post might contain affiliate links
- Crepe paper or printer paper
- Green floral wire
- Hot glue gun and glue sticks
- Scissors
- DreamyPosy’s peony paper flower template (please scroll down to the bottom of the post)
Video tutorial to make a peony from paper
Contents
This tutorial I made a long time ago, as a guest post and now it’s time to publish it on my site.
Step-by-step instructions to make a paper Peony flower:
Step 1: Cutting the peony petal template.
Once you have gathered your materials, you can begin by using our peony petal template and cutting out the petals for your peony. The petals can be any size that you like, adjust them right from your printer setting. However, it is important to make sure that the petals are all in the same peony pattern ratio so that your peony looks uniform.
Measurements: The finished paper peony from this peony template is about 4 inches. Please scale out if you want to make larger flowers. The number of petals for each flower is noted in the template.
Step 2: Make the paper peony stamen
To make the stamen, cut a paper strip that is 2 centimeters wide and 20 centimeters long. Color the strip to your liking. (In the video, I cut a 4-centimeter-wide strip, but I had to trim 2 centimeters off because it was too long to fit inside the sepal at the bottom of the flower.) Once the strip is colored, cut it into an eyelash shape.
You could find another realistic paper stamen technique from my tutorial to make a coffee filter rose.
Step 3: Curl the petals
Start by curling the edges of each petal with your fingers. This will help to give the petals a more realistic look.
If you use crepe paper, just start by Start by curling the edges of each petal with your fingers and the edge of the scissors. This will help to give the petals a more realistic look.
For printer paper: To create wrinkled paper from printer paper, twist the paper between your palms and rub them together, as shown in my video tutorial. The wrinkles will help you shape the paper petals more easily.
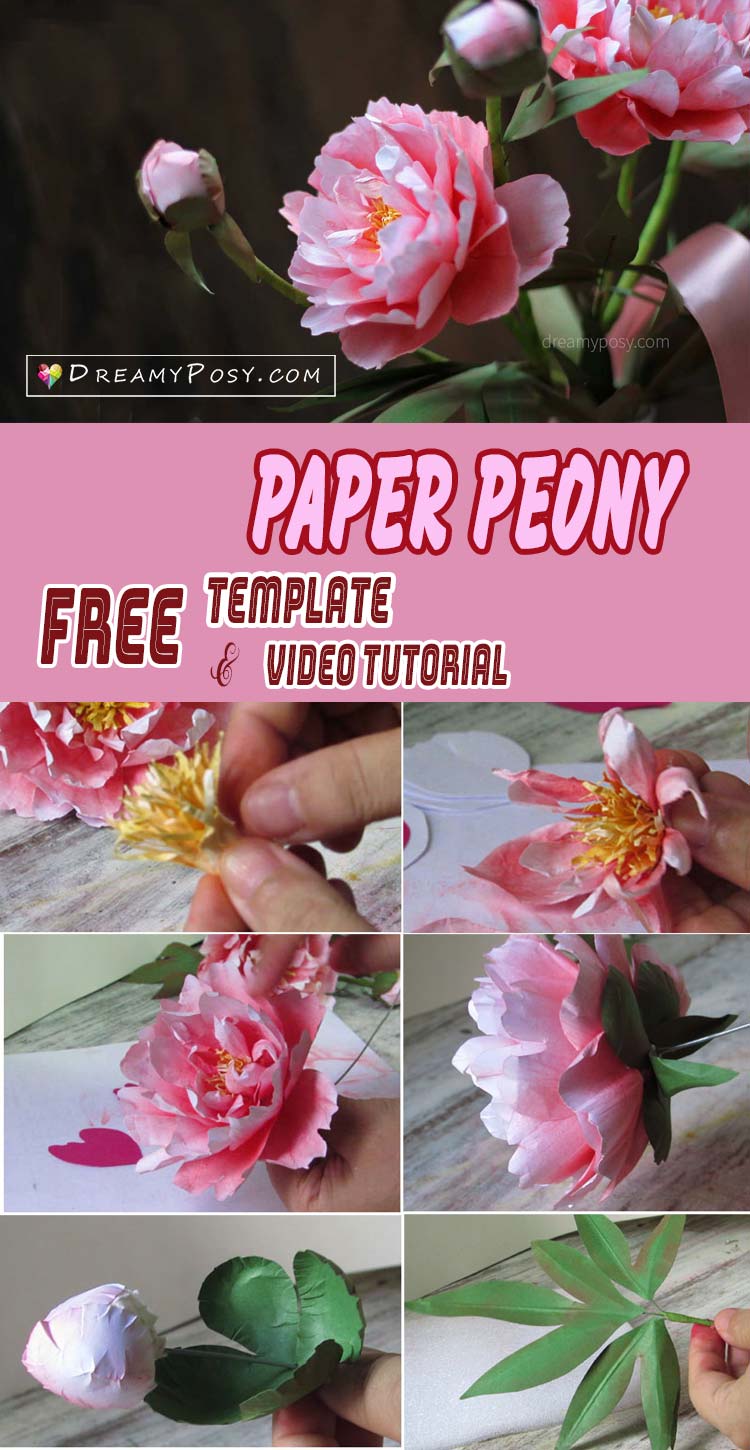
Step 4: Assemble your paper peony.
Before gluing the stamen to the floral wire gauge #20, make a small hole at the end of the wire.
Attach the petals to the stamen and floral wire. Start by attaching the smallest petal strip next to the stamen. Then, attach the 4 smaller petals around. Continue adding larger petals until you have created a full peony flower.
Please ensure to glue the petals interleaved.
Step 5: Make the paper peony sepal:
Cut the sepal template and use the ball sphere stylus to shape the petals before gluing it to the bottom of the peony flower.
Step 6: Make the paper peony stem and leaves:
Insert the floral wire into a 3mm transparent PVC tube and bend the wire at the end of the stem to secure it. Then, wrap floral tape around the tube to cover the wire and create a smooth finish.
Glue the paper peony leaves with floral wire gauge #24 and create the leaf veins by pressing the tiny ball stylus along the leaf template dot lines.
To insert the paper leaf into the tube, poke a hole in the tube with a sharp object, such as a needle or a pin. The hole should be large enough for the leaf to fit through.
Step 7: Make the paper Peony bud
Create a small sphere shape by wrapping the tissue paper or foil around the floral wire gauge #20.
Cut out the bud petals and sepals and use the round stylus and foam to shape it.
Glue it together.
Here are some additional tips for making beautiful paper peonies:
- Use a variety of colors of crepe paper or add color to printer paper to create a more realistic-looking flower.
- For a more realistic look, use our peony template to cut out your petals.
- Use a small amount of hot glue to attach the petals together, using a 20w glue gun to avoid burning yourself.
- With a little practice, you will be able to make beautiful paper peonies that will look like the real thing!
Once you have added the details, your peony is complete! You can use your peony to decorate your home or to give as a paper peony bouquet.
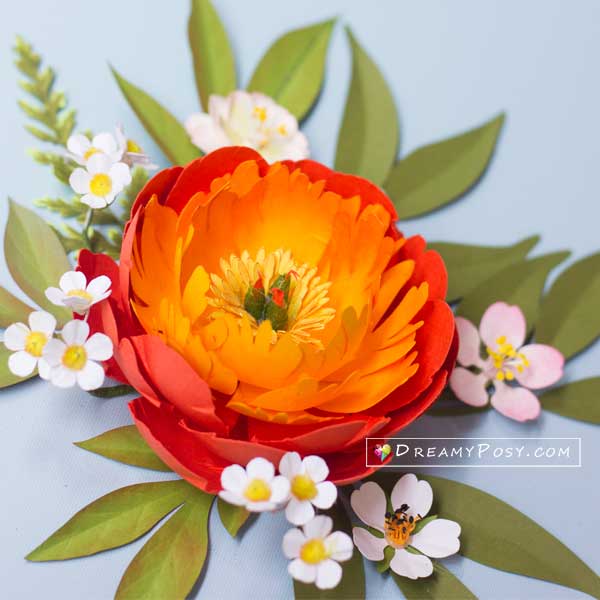
See more >> The Coral Charm paper peony tutorial.
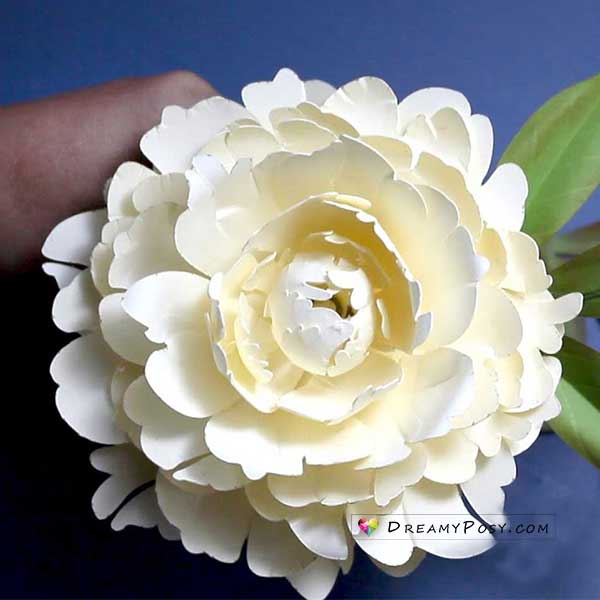
See more>> Bowl of Cream paper peony svg template
The free templates are for personal use only.
Happy craftings,
Ann.


PS. I forgot to ask you, are the templates smaller than the ones you actually make? The templates look a lot smaller than the flower looks while you are making it. Thanks again!
Hi Marilyn, I tried to shoot my video in focus view so the petal might look larger. You can see my big fingers there (actually my hand is so small), lol. If you want to make larger flower, pls just adjust the template size in your printer setting. Thanks.
You are awesome! I love your tutorials and I love the fact that they are free as I am on a limited income. Thank you so much for sharing! I have looked at all the others on youtube and none compare to yours. Yours are simple to make and they are prettier than anyone else’s! Thanks again!
Thank you, Marilyn for such nice words.
Your site is so fantastic. I’m going to come back here again.
Thank you, Rosana.
I can’t seem to find the link to the template for the peony – it is not highlighted like other pages 🙁
Thank you so much, Karen, for let me know the issue. I don’t know why it happened to this page recently. I’ve just updated the link.
Thank you for sharing. These are gorgeous! Look forward to trying to make them. Keep up the good work, you’re a very talented artist.
Thanks P. These peonies would be perfect with the paper dusty miller, check out the tutorial here: https://www.dreamyposy.com/paper-bridal-bouquet/. Look forward to see your bridal bouquet 🙂