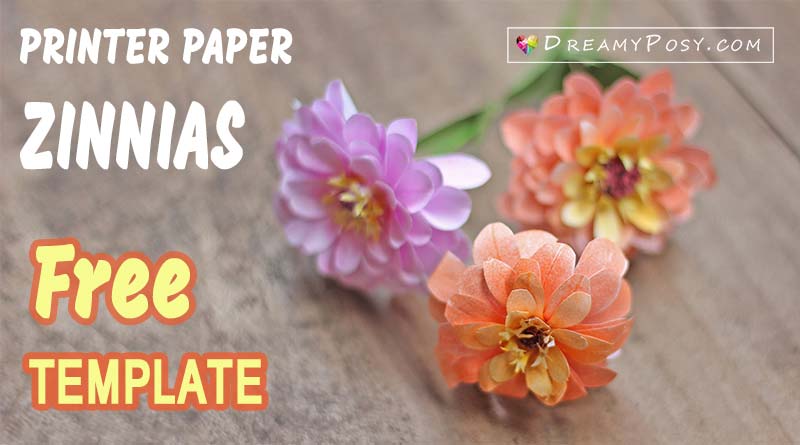
DIY Zinnias flower from printer paper, FREE template
Tutorials of Zinnias paper flower with the FREE template, made from printer paper and pastel chalk, is a perfect summer craft for you.
Video tutorial to make Zinnias paper flower:
I got some requests to make zinnias paper, so I’m sharing it with you now. Zinnias are not kind of flower that you will love at the first sight, but if you will definitely love it as you have a close-up look, so brilliant.
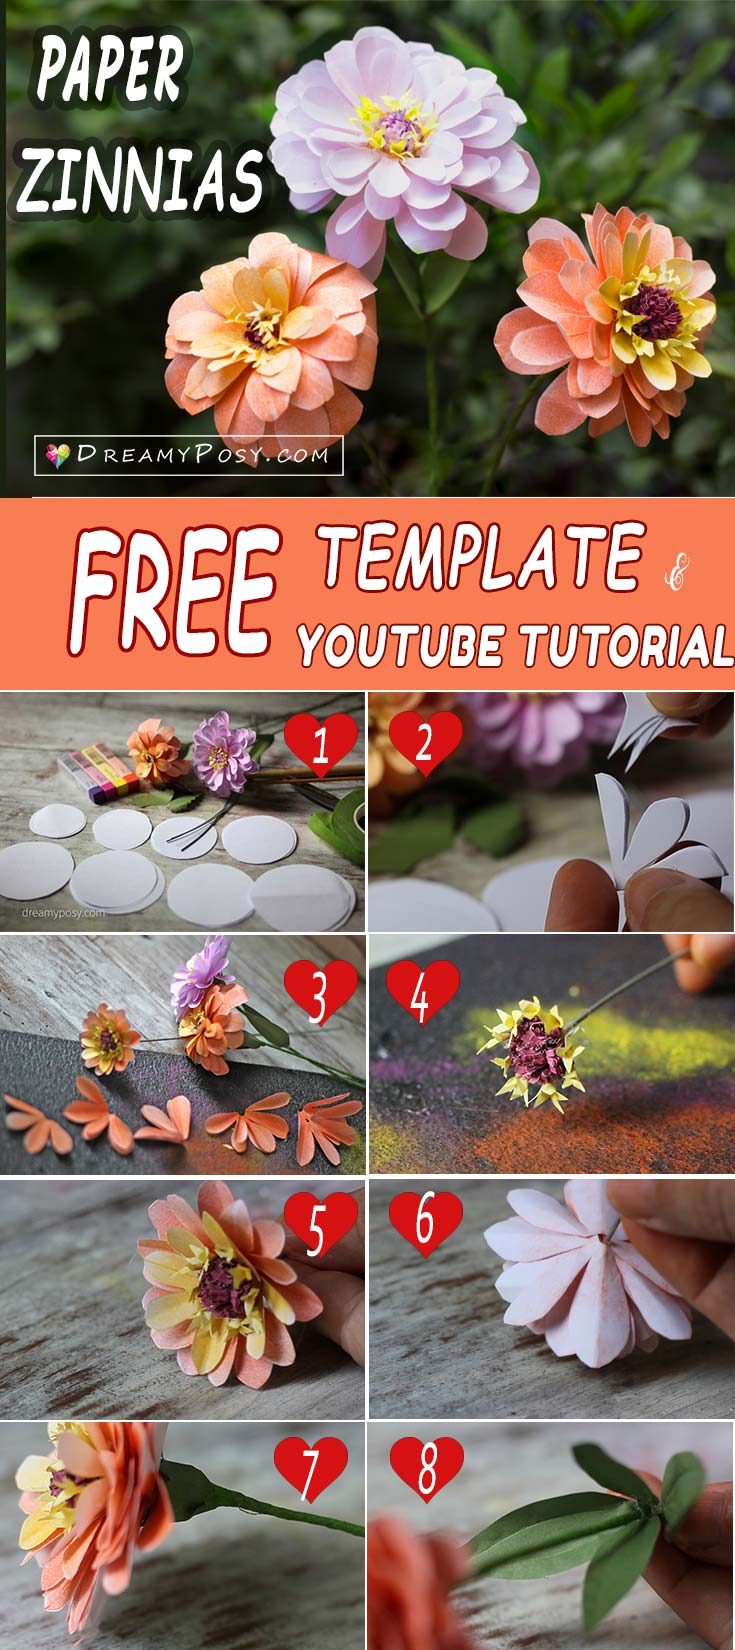
Step by step instruction to make Zinnias paper flower:
- Download the template and cut out with plain printer paper and green paper
- Fold and cut the paper circle as video instructed. No worry if you cut the petal in different sizes, as the real petals have different sizes 🙂
- Make the fringed center with 2 strips 1cmx 21cm, fold and cut as an eyelash. Use glue gun to attach with the wire to make stamen.
- Keep the remaining of the above circles, then cut, color and glue for about 8 tiny flowers around the stamen.
- Color the smallest petal layer with yellow and the bigger layers with orange (you can create your own favorite color here).
- Shape the petals in different ways with scissor or stylus, as the video tutorial.
- Cut the circle petal in half and glue it around the stamen.
- Cut out a strip of ordinary tissue paper to make a sepal shape under the last petal layer. Around with my sepal template.
- Use floral tape or green paper strip to wrap the wire
- Cut and use the scissors to make the leaves and finish it.
What you will need to make Zinnias paper flower:
(affiliate links)
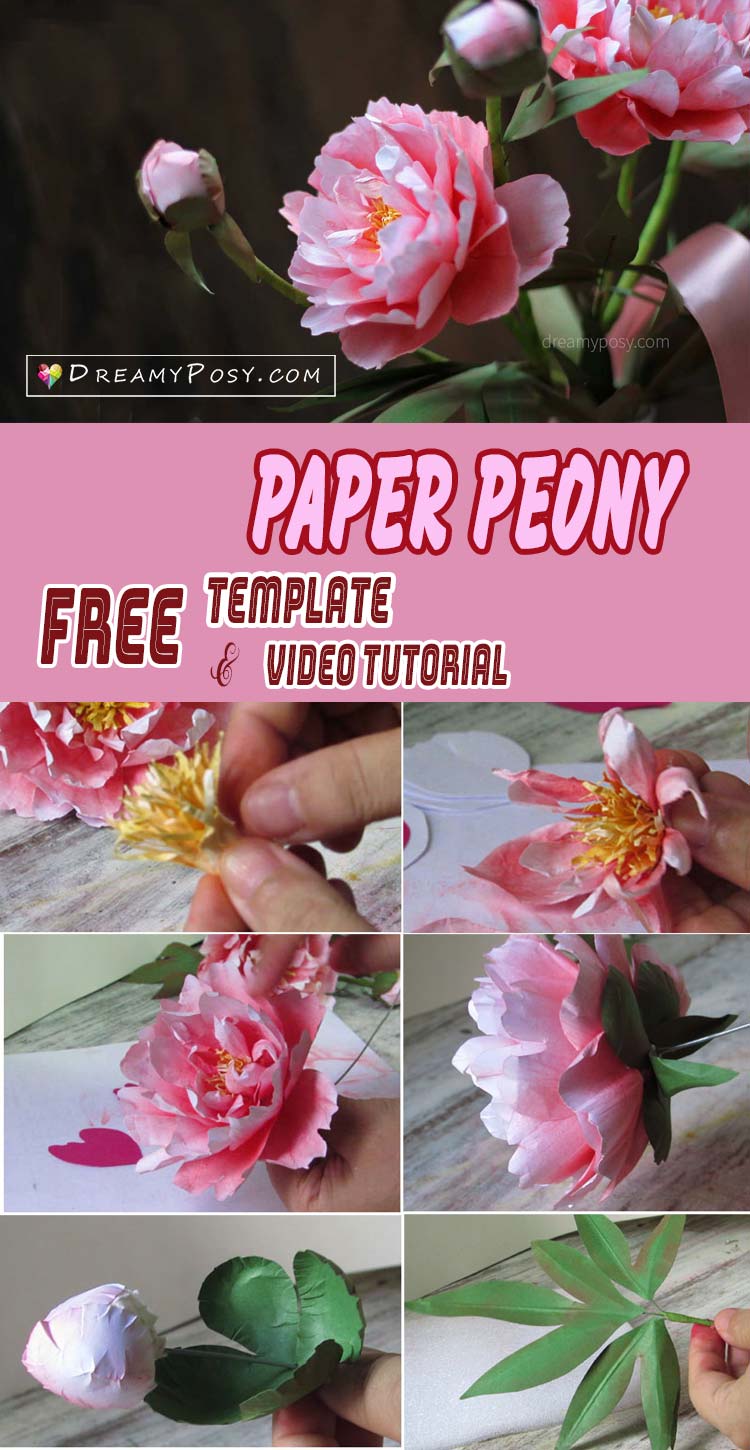
There are so many pieces of peony, but I decided to use printer paper to make the Peony alike at this time. With my free template and step by step video tutorial, it’s so easy to have a paper Peony garden in your room now 🙂
This tutorial I made a long time ago, as a guest post and now it’s time to publish it on my site.
Step by step instruction to make paper Peony:
8 steps to make Peony paper flowers:
Cut a paper strip of 2cm x20cm and color it to make the stamen. (In the video, I cut a 4cmx20cm but I had to trim out because it will not fit the sepal in the bottom of the flower).
Cut and use your hands to soften the stamen.
Glue the stamen with the wire gauge20
Cut the petals with DreamyPosy’s FREE templates, color and soften it. The inner petals will have white space than the outer ones.
Glue and shape the petals
Glue the petals with the stamens accordingly as video instruction.
Cut the sepal with the template and use the round stylus to shape it.
Cut 2 tiny leaves and glue it with the sepal in the bottom of the flower.
4 steps to make paper Peony bud:
Use facial tissue to round up a small ball and glue it with the wire gauge20
Cut out the bud petals and sepal and use the round stylus to shape it
Glue it together.
Please remember to include 2 tiny leaves with the sepal.
3 steps to make paper Peony leaves:
Cut the green paper along the template
Glue it with floral wire gauge26
Use the red pastel chalk/red watercolor to help the leaf more realistic
What you will need to make paper Peony flower:


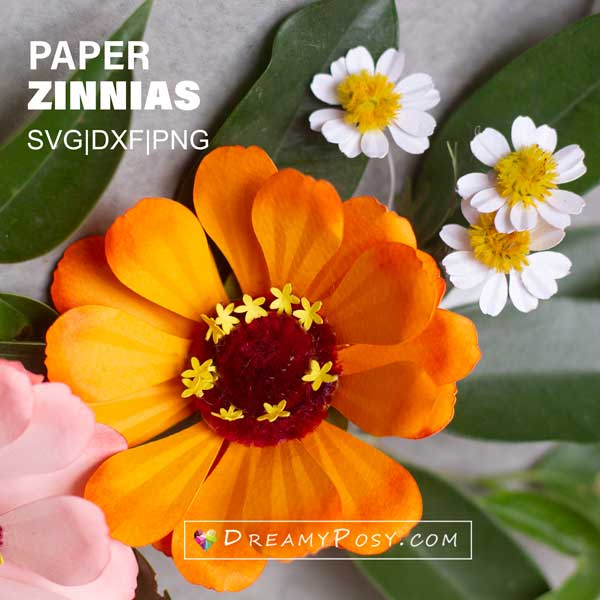
You might want to have a look on my new Zinnas svg template and tutorial
Loves,
Ann.


These are absolutely PERFECT. These remind me of my childhood- the garden was always full of zinnias all summer long. My favorite. Now I can make them last forever. Thank you
I’m happy to hear so. Thank you, Tee.
All of the flower tutorials on this site are excellent, they are so realistic and you show all of the detail on how to make them easily. I have told many of my crafting friends to look at your site as my flower making has improved greatly since I tuned in to your videos. THANKYOU SO MUCH.
Oh, Janice. It’s so sweet to hear that. It’s so great to have your compliments on the first day of the year. Thank you sooo much.
I cannot find the template for the Zinnia flower….please advise…your instructions make it easy to accomplish your flowers
The PDF template is just a small link in the end of material list. Thank you, Mary.
These are stunning and look sufficiently simple to make in your instructional exercise, however i don’t exactly comprehend the bordered strip in the middle and how to append the wire stem. Those parts were lost in the video.
Pingback: Paper greenery tutorial, FREE template | DreamyPosy.com
These are gorgeous and look easy enough to make in your tutorial, but i don’t quite understand the fringed ribbon in the center and how to attach the wire stem. Those parts were missing in the video.
Thank you, Kathy, for stopping by. For the fringed ribbon in the center, it started in 1:14 to 1:20 in the video clip. I cut two long strips of 1cm x 21cm, fold and cut as eyelash and use the glue gun to attach to the wire. If you still have any queries, please just let me know. I will try to write down the detail instruction right now, I always ignore this step as my English is not good enough to describe it.