Rainbow paper rose tutorial and free template
Making a rainbow rose from paper is quite easy. And it lasts for years, even ten years.
It took me just about 30 minutes to hand cutting and glue a rainbow rose. And really want to share it with you all for free.
What is the meaning of a rainbow rose?
Contents
Rainbow roses are a type of rose that has been artificially colored to have a rainbow of colors. They are often given as a symbol of hope, happiness, and love.
The colors of the rainbow rose can represent different things. For example, red can represent love, orange can represent enthusiasm, yellow can represent happiness, green can represent growth, blue can represent peace, indigo can represent creativity, and violet can represent spirituality.
Here are some other possible meanings of a rainbow rose:
- A new beginning
- A celebration of life
- A sign of hope
- A symbol of love
- A reminder of the beauty of the world
No matter what the meaning, a rainbow rose is sure to be a cherished gift.
Video tutorial to make a paper rainbow rose, step-by-step
Materials needed to make a paper rainbow rose
- Color paper (cardstock from 120gsm to 180gssm)
- Scissors or cutting machine
- Glue gun or Sticky glue
- Awl tool
- Scoring tool
- Floral wire
- Floral tape
- My below templates (just click on the button)
The technique to make this paper rose is not new. You might find that there are many different ways to make paper roses, from different kinds of paper.
I just try to share you here the template, and how to arrange the rainbow color petals in 2 different ways.
Step-by-step instructions on how to make rainbow roses from the paper:
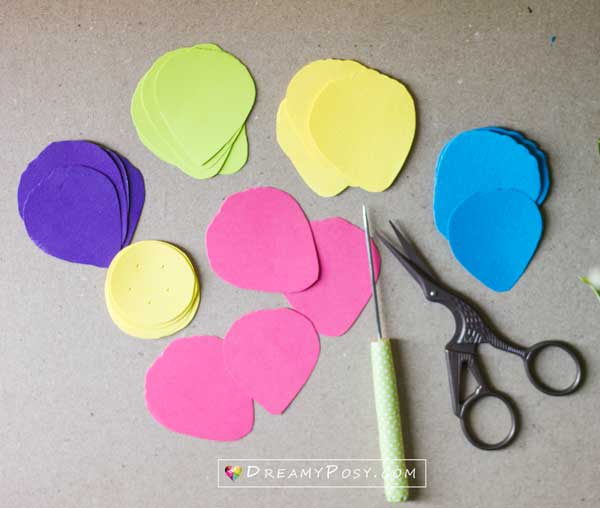
1. Cut the petals from my free rainbow rose template
My rainbow rose is designed with 5 petal template basic, so we will have 5 colors. Each color will have 4 petals in 2 different sizes (1 small size petal and 3 larger size petal).
And we will need 4 base circles. You can cut these with your scissors or cutting machine, I prepared the PDF, SVG and PNG templates for free.
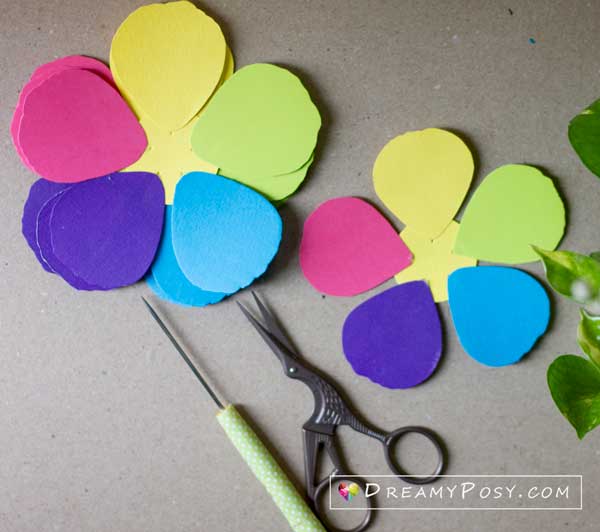
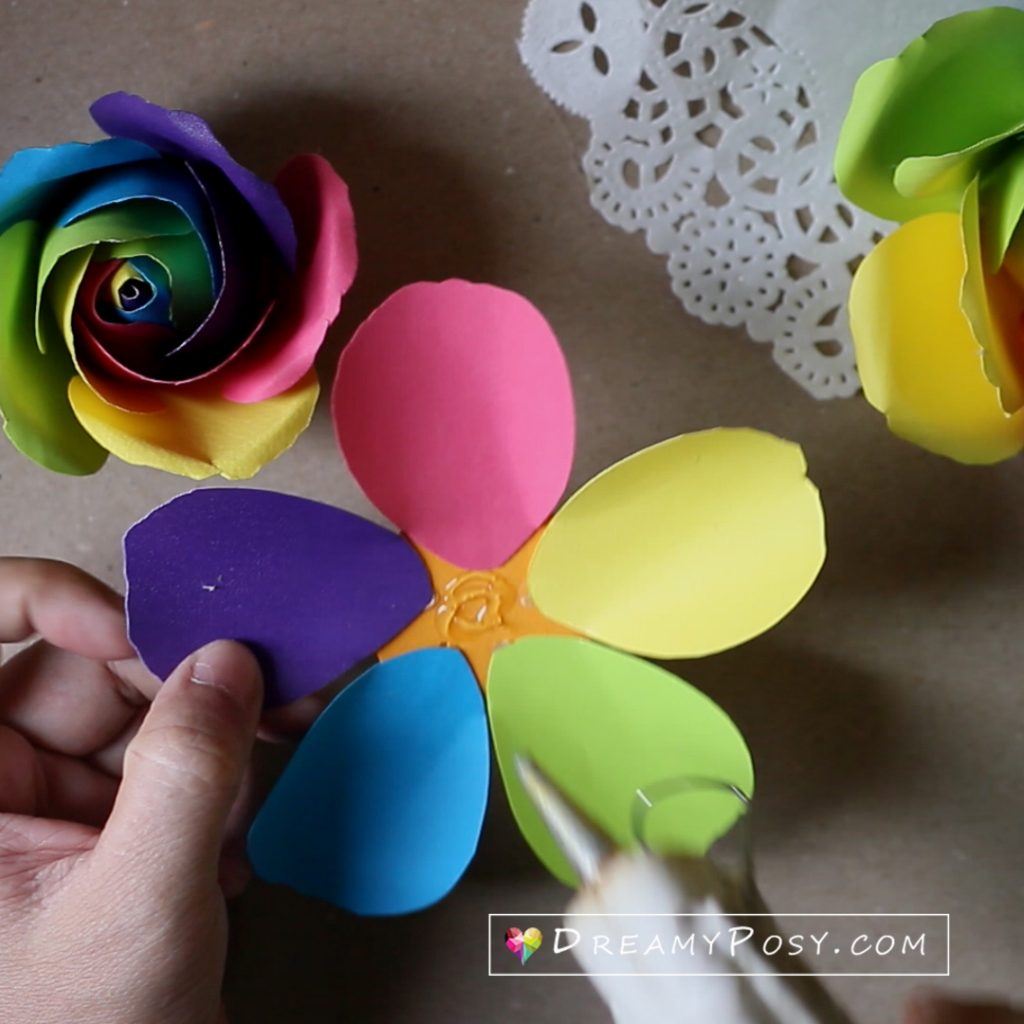
2. Glue the color petals to the base circle.
We will make 4 layers by gluing 5 different color petals to the circle base, in the same color order. There are little holes in the circle so that you could glue the petal exactly.
I used the glue gun, but you could use Tacky glue.
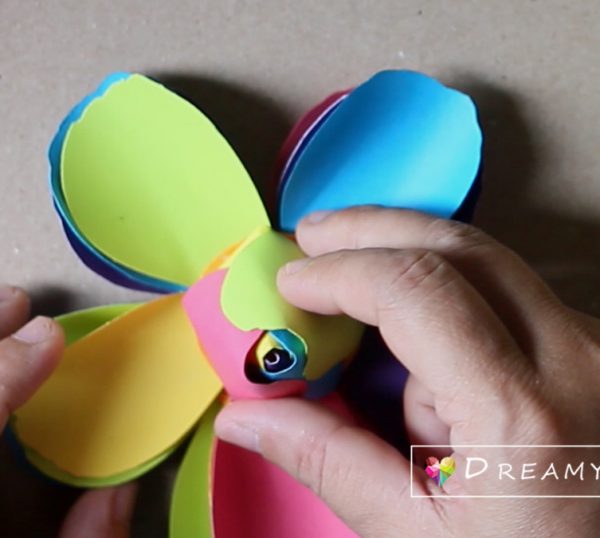
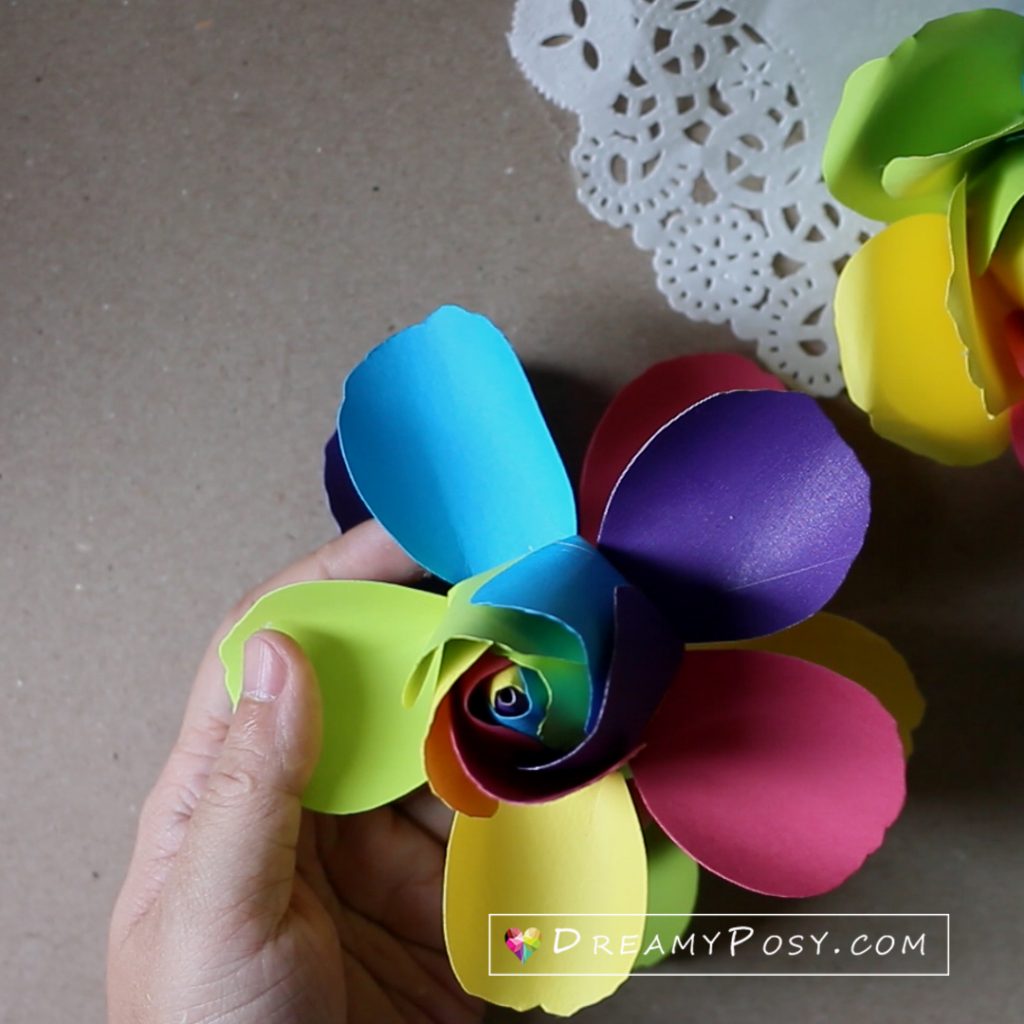
3. Make the paper rose as usual
If you have seen my basic paper rose tutorial, you will recognize the technique used in this rainbow rose. Just watch the video tutorial to follow each step in making this easy rose. This image shows when I added the second layer of petals to the rose flower.
4. Add the third and fourth layers
Here is the photo from when I added the third layer of petals.
As you might be noticed, the space between the first layer’s petals is close.
These spaces of the second and third layers are larger and larger.
The spaces between the layers are adjusted by the angle of the petals and the place we glue.
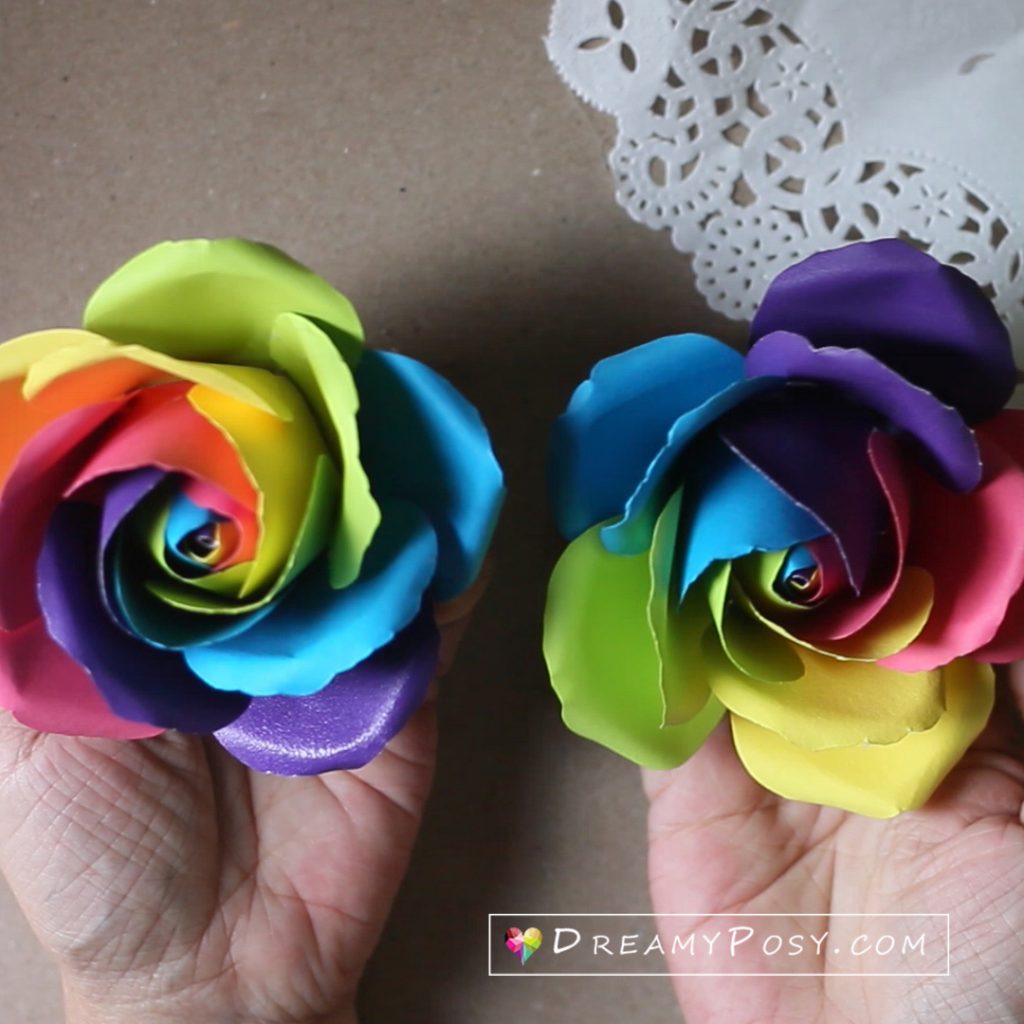
5. Two different color arrangements
Look at the way how we arrange the color petals, one is a spiral style and one is just the same color in the same place.
I love both styles. Please see the video for clearer instructions.
And this is the large rainbow rose that I applied the more difficult technique, as the petal forms are in different styles. The technique is shared on this paper rose tutorial here.

Tips and tricks to make a beautiful paper rainbow rose:
I’m sorry that my English is not good enough to express what I want to share, so I tried to make a short video without my voice.
But please don’t skip any steps in the video, because I failed a lot and I tried my best to make the video as short as I could, to save you time.
- Use high-quality solid paper (the one that does have a white core).
- You can choose your pallet of colors to create your own rainbow pallet rose.
- Add a touch of realism by adding a stem and leaves to your rose.
- Make sure you have an awl to curl the petals, the form of petals is very important to the final flower’s form.
- Please be specific to the symmetry of the 5 petals (the distance between petals, the degree diagonal).
- Don’t rush, I always arrange the petals carefully (without glue) and will not glue them until I’m happy.
- Pay attention to where I glue for each layer, it’s not the same places.
- Try low temp (20w) glue gun to avoid burning your finger and you still have time to adjust the petals before they are fixed.
- And finally, keep practicing. I practiced a lot before shooting the video, hehe.

I always want to share all for free. Therefore, as many people can get benefit from this therapy as possible. But I found that some guy took my free templates, edited and sold them. Of course, it’s my fault that I did not make it good enough, and did not promote it well enough.
So I decided that I will improve my flowers, share the easy ones for free, and sell the more difficult ones with just low prices. And I would like to ask you to do me your favor: don’t share DreamyPosy’s template directly, please go to my blog and get them.
That’s all. I’m sure that you can master this rainbow paper flower soon. Please share your flowers with me.
Ann.


Oh my goodness, I’m totally addicted to your website. So much so that i ran out and bought me a new printer, paper, cardstock etc.
Had a few hiccups along the way. But i just printed out your Rainbow Rose Template.
And i’m curious. (I noticed it before but thought it was a printing error.)
The templates seem much smaller than i figured they would be. Is there a size scale to go by? Idk maybe it’s just me. Haven’t had the chance to actually complete a flower yet. But they just seem so small
Hi Brenda, thanks for nice words. I believe that you can adjust the ratio in the printer setting dialog box (on your computer). It might be in advanced setting. Pls check it out.
Loves,
Ann
How beautiful I have to give these a try thank you so much.
Thank you, Holly, for leaving me the comment.