Easy 3D Paper Ornaments: 8 Unique Bauble Shapes (PDF & SVG Templates)
Transform your holiday decor with these elegant, geometric 3D paper ornaments! Whether hanging from a mantelpiece or decorating a Christmas tree, these DIY paper ornaments add a touch of handmade charm to your celebrations. With 8 different shapes and templates, you can easily mix and match colors, patterns, and cardstocks to create a stunning winter wonderland display using our 3D paper ornaments templates.
If you already downloaded our popular set of 4 3D paper ornaments, we have some exciting news! We’ve just upgraded the post to include 4 brand-new designs, bringing the total collection to 8 unique shape baubles. Best of all, whether you prefer hand-cutting or using our 3D paper ornaments with Cricut SVG files, crafting these holiday decorations has never been easier.
This is really the most wonderful time of the year, the time we are full of Christmas craft ideas, of love and hope, of joy and fun, of laugh and peace, we gather around the craft room and try to create our own Christmas projects (like these handmade ornaments, paper angel ornament to decorate our Christmas tree and Cricut gift boxes).
Explore the 8 Shape Baubles
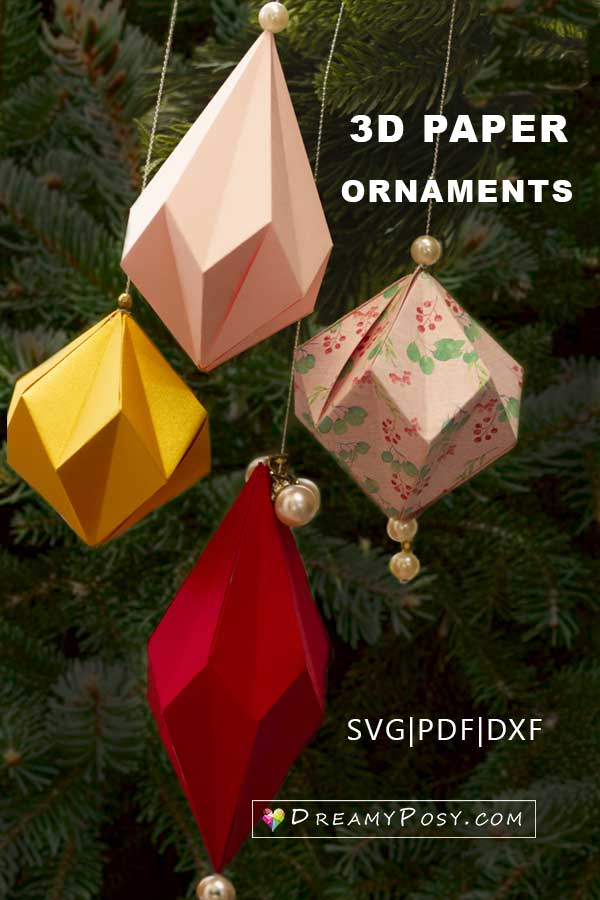
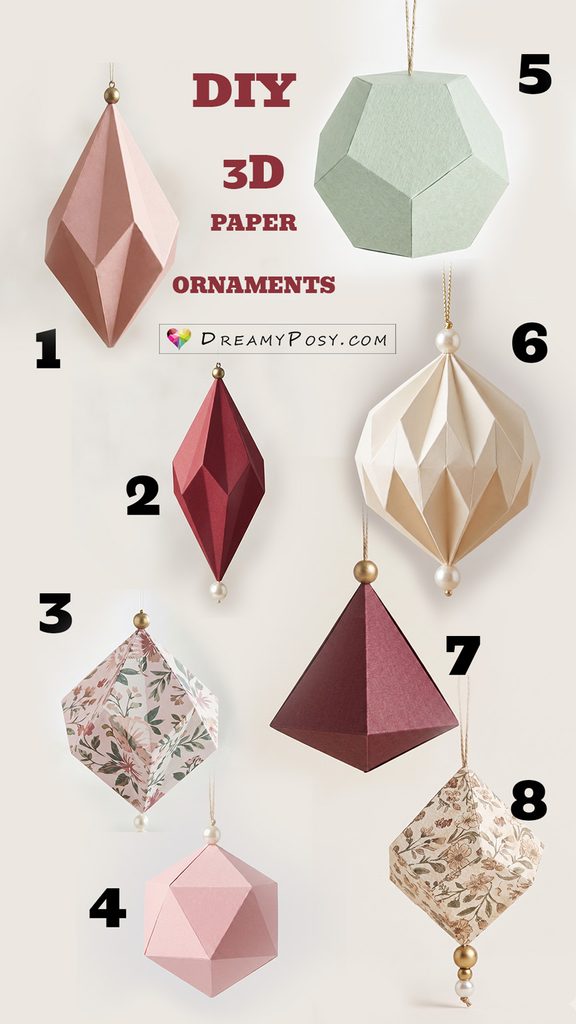
This expanded paper ornament tutorial collection features 8 distinct geometric designs, ranging from classic faceted diamonds to modern polyhedra:
- Patterned & Solid Mix: Combine festive floral prints with solid metallics for a rich, textured look inspired by vintage-inspired paper ornaments.
- Classic Melon Baubles: Featuring curved fluted segments with elegant beaded ends, perfect for traditional cardstock Christmas ornaments.
- Polyhedron & Faceted Spheres: Modern geometric shapes that catch the light beautifully and showcase crisp folded paper baubles templates.
- Diamond & Drop Ornaments: Elongated shapes ideal for adding vertical interest to your tree, mantel, or holiday centerpiece.
Materials & Tools Needed
To get these exact professional results, having the right supplies makes all the difference. Here are my go-to crafting essentials to help you bring these 8 stunning baubles to life:
Disclosure: This post contains affiliate links; I may earn a small commission at no extra cost to you. Find out more here.
- Cardstock Paper: Click here for my favorite metallic and solid cardstock packs – Using heavy-duty cardstock (around 65lb to 80lb) ensures your geometric lines stay crisp and hold their 3D shape all season long.
- Scoring Tool & Bone Folder: Grab a precision scoring tool here: Bone folder or Scoring Stylus Tool Set – Crisp creases are the secret to professional-looking paper crafts. This tool helps you get sharp folds without tearing the paper.
- Quick-Drying Craft Glue: Find my favorite quick-set adhesive Precision-tip craft glue pen or Fine-point Liquid Glue – A fast-drying glue or fine-tip precision glue pen makes assembling the tabs quick and mess-free.
- Electronic Cutting Machine: [Check out the latest Cricut and Silhouette machines] – Want to speed up the process? Use an SVG-friendly cutting machine to cut out all 8 templates effortlessly.
JPG - Hanging Cord & Decorative Beads: Shop Natural Jute Twine, Satin Ribbon, or Metallic Craft Thread here – Finish your ornaments with a touch of elegance by adding gold cord and beads to the top and bottom
Step-by-Step Tutorial to make these stunning 3D paper ornaments collection:
1. Download and Cut the Templates
1.1.Cutting and Scoring by hands
If you prefer the relaxing, screen-free craft of hand-cutting your ornaments, you can easily achieve professional results using the PDF templates and a few basic supplies. Here is how to do it step by step:
Print on Cardstock: Open the PDF template and print it directly onto your choice of heavy cardstock (80lb+ is recommended for the best structural support). Tip: Print directly onto the back side of patterned or colored paper if you want to avoid seeing template lines on the outside of your finished bauble.
Cut the Outer Perimeter: Using a pair of sharp precision scissors or a craft knife on a self-healing cutting mat, carefully cut along the solid outer border of the template. Take your time around the sharp corners and intricate edges for a clean finish.
Score the Folding Lines: Before folding, scoring is essential to prevent the thick paper from cracking and to ensure your geometric folds are razor-sharp.
- Align a metal ruler along the interior dashed (mountain) and solid/red (valley) lines.
- Run a scoring stylus, a bone folder, an embossing tool, or even the back tip of a dry ballpoint pen firmly along the ruler guide to create a deep, clean crease.
1.2. Cutting and Scoring by machine
1.2.1.Cutting: Using an electronic cutting machine is the fastest and most accurate way to prep your 3D ornaments. Follow these simple steps in Cricut Design Space or Silhouette Studio to get flawless cuts and clean score lines every time:
- Upload and Resize: Upload the SVG or DXF file into your cutting software. Select all layers of your chosen ornament shape and resize them together if you want to make your baubles larger or smaller.
JPG - Set Your Line Types (Crucial Step):
- Score Lines: Select the internal dashed/solid lines and change their Operation (or Line Type) from “Cut” to “Score” (or “Perforate” if you prefer dotted fold lines).
- Cut Lines: Ensure the outer boundary of the template remains set to “Cut”.
- Attach / Group Layers: Before clicking “Make It,” select both the score lines and the outer cut template together, then click Attach (in Cricut) or Group/Compound (in Silhouette). This locks the score lines in their exact correct positions on the paper.
- Choose Your Material: Select Cardstock (Heavy – 80 lb) or Medium Cardstock from your material settings list to ensure the blade cuts cleanly through the thicker paper without snagging.
- Load and Cut: Place your cardstock onto a StandardGrip mat, load it into your machine, and let it work its magic. Unload the mat and gently peel the cardstock away, rolling the mat backward to prevent curling.
1.2.2. Score the Lines: Getting crisp, precise folds is the secret to transforming a flat sheet of cardstock into a professional, flawless 3D geometric bauble.
Looking closely at the template layout, the internal lines alternate to create the signature accordion-style 3D ridges:
- Black Dashed Lines (Mountain Folds): Score these lines so the paper folds away from you, creating sharp ridges that point upward toward the viewer.
- Red Solid Lines (Valley Folds): Score these lines so the paper folds toward you, creating creases that sink inward.
2. Fold the Paper:
Pre-Score Everything: Before folding, run an embossing tool, a bone folder, or a dry ballpoint pen firmly along all the black dashed and red solid lines using a ruler. Good scoring prevents the cardstock from cracking and ensures sharp, clean edges.
- Alternate Your Folds: Working your way around the circular template from the center point outward, alternate folding each segment: make a Mountain Fold on every black dashed line and a Valley Fold on every red solid line.
- Train the Accordion: Once all lines are creased, gently pinch and press the entire template together accordion-style. Allow the paper to naturally coil and collapse into its circular 3D form.
3. Assemble the Bauble:
Once you have finished scoring and accordion-folding your template, it is time to assemble the flat piece into a stunning 3D bauble:
- Apply Adhesive to the Side Tab: Lay your folded template flat and apply a thin line of quick-drying craft glue or double-sided tape along the outer edge tab.
- Join the Ends: Bring the two outer edges of the template together, wrapping them around to form a closed, cylinder-like ring. Press firmly along the glued seam to ensure a secure bond.
- Form the 3D Sphere: With the side seam secured, gently push the top and bottom centers inward. The accordion folds will naturally collapse and curve to form the complete 3D geometric shape.
4. Add Hangar and Beads:
Thread your metallic string or gold cord through the central hole from top to bottom, securing decorative beads at both ends to hold the ornament securely in shape and give it a polished finish.
Stay tuned, we will update other Cricut Christmas projects soon,
Templates
These are our old 4 bauble shapes
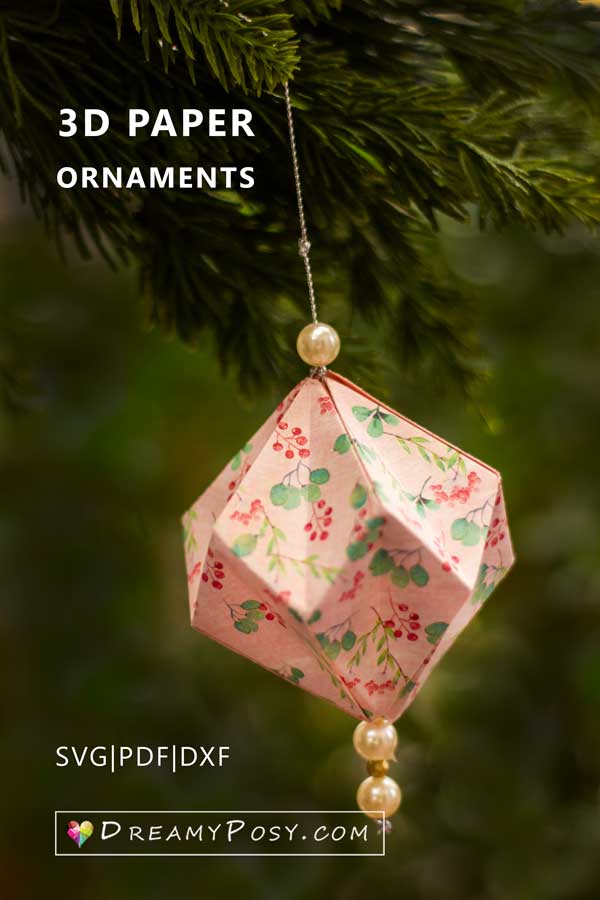
These are our whole 8 bauble shapes collection.
Happy craftings,
Ann.
Last updated: 24 Oct, 2026