Intricate paper flower DIY Easy Tutorial & Template Ideas
Looking to elevate your paper crafting skills with a project that looks breathtakingly complex yet is approachable to make? If you love delicate textures and dimensional details, this intricate paper flower DIY project is for you!
Combining the elegance of laser-cut lace style cardstock petals with the rich, textured warmth of a quilled flower center, this DIY masterpiece makes a gorgeous statement piece for wall art, gift boxes, or special event decor.
Materials You Will Need
Before diving into this intricate paper flower DIY, gather your crafting supplies:
Disclosure: This post contains affiliate links; I may earn a small commission at no extra cost to you. Find out more here.
- Light pink cardstock (for the petal base layer).Click here for my favorite metallic and solid cardstock packs
- White cardstock (for the laser-cut intricate pattern layer).
- Dusty rose and light pink quilling paper strips.
- Electronic cutting machine (such as Cricut or Silhouette), or a precision craft knife.
- Quilling tool (slotted tool).
- Craft glue / paper adhesive. Find my favorite quick-set adhesive Precision-tip craft glue pen or Fine-point Liquid Glue – A fast-drying glue or fine-tip precision glue pen makes assembling the tabs quick and mess-free
- Small pearl beads (white or light pink). Shop Natural Jute Twine, Satin Ribbon, or Metallic Craft Thread here
- Flower shaping tool (ball tool) and foam mat.
Detailed Instructions:
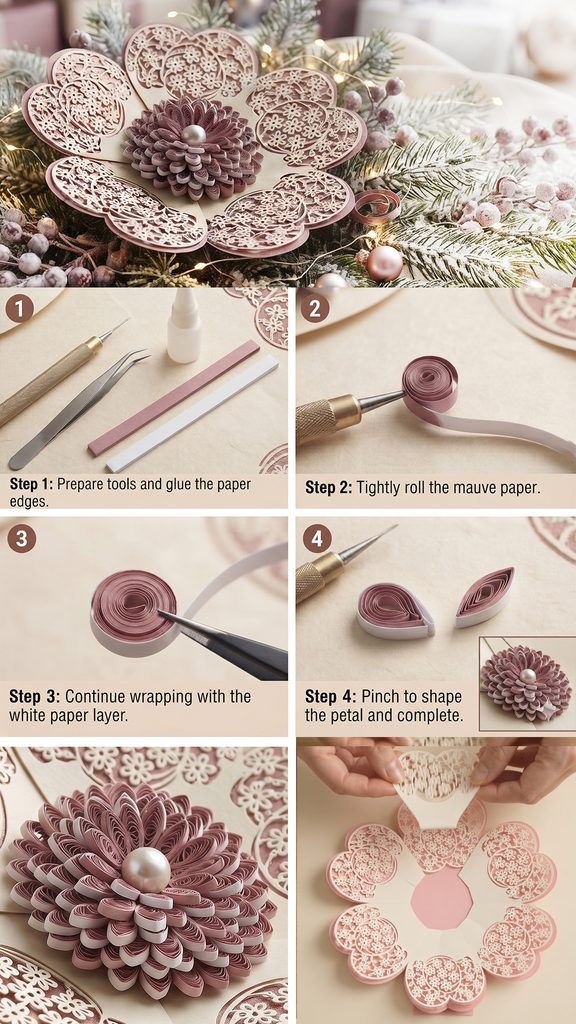
Step 1: Prepare the Petal Layers
- Base Layer (Light Pink): Cut out 5 separate petals, each featuring a wide heart-shaped top and tapering toward the base, similar to the petal shapes (though you will cut them out individually instead of keeping them connected as a flat flower base). Set them aside.
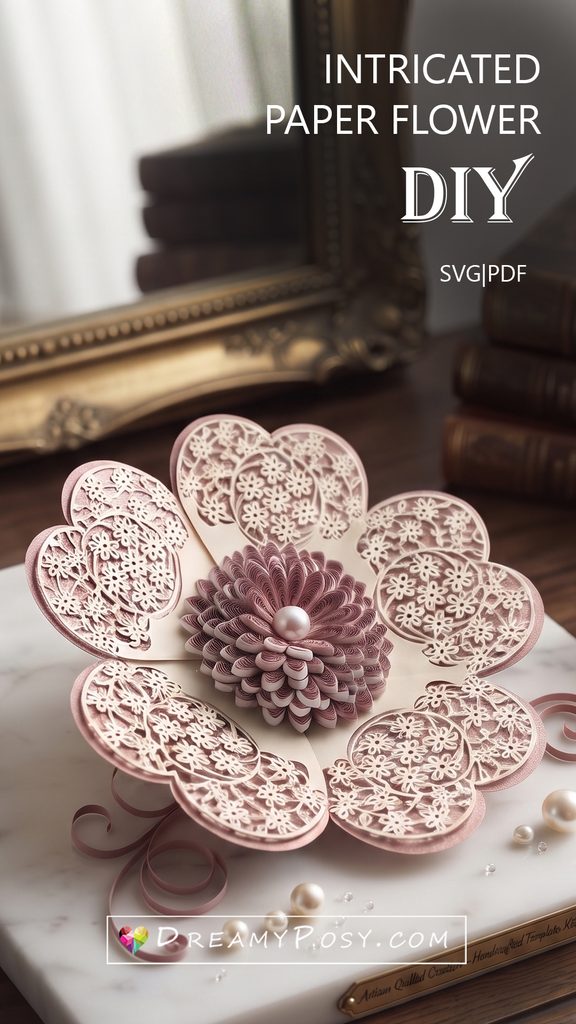
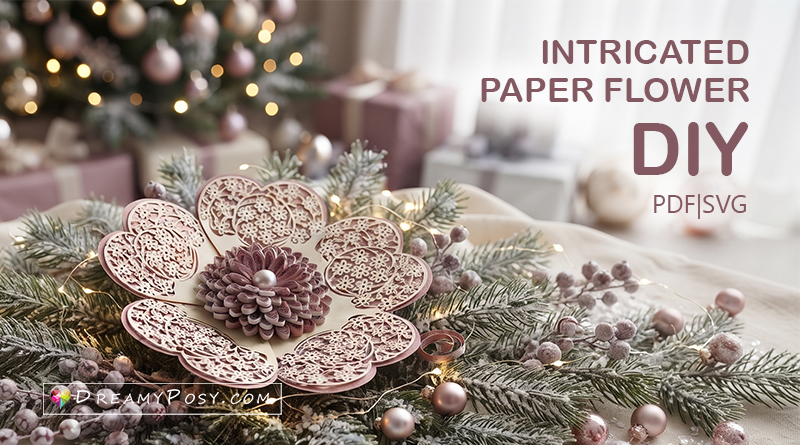
- Pattern Layer (White): Use your cutting machine to cut 5 petal shapes identical in size and outer contour to the base layer, but featuring an intricate laser-cut lace pattern inside. This lace pattern should incorporate small floral clusters as shown in Figure #2.
- Assembling the Petals: Carefully glue each white lace pattern layer onto its corresponding light pink base layer, aligning the outer edges cleanly.
Step 2: Shape the Petals
- Place the assembled petals face up on the foam mat.
- Using the large end of the ball tool, gently press and swirl at the center of each petal (where the lace clusters begin). This will create a gentle, concave cupped dimension for the petals.
- Repeat this process for all 5 petals.
Step 3: Create the Quilling Flower Center
- Prepare the Strips: Cut dusty rose and light pink quilling strips. You will use these to create an ombre gradient effect.
- Roll the Core: Start with a light pink paper strip, rolling it tightly with the quilling tool to form a small tight coil. Apply a tiny dot of glue at the end to secure it.
- Wrap the Outer Layers: Continue wrapping dusty rose strips around the light pink core. Ensure a smooth, seamless transition when joining new strips. Keep wrapping until the center reaches your desired diameter (approximately 2.5 – 3 cm). Secure the final end with glue.
- Create Dimension: Gently push the center of the paper coil upward from the back using your fingertip or a shaping tool to form a raised dome or cone shape. Apply a small amount of glue to the inside of the dome to maintain its shape permanently.
Step 4: Assemble the Flower Base
- Cut a small round paper circle (in white or light pink cardstock) to serve as the center backing base to mount your petals onto.
- Apply glue to the pointed base of each petal.
- Glue the 5 petals sequentially around the central backing circle, overlapping them slightly to form a complete, balanced circle with the pointed tips facing inward and the lace patterns facing outward. Ensure the petals are evenly distributed.
Step 5: Attach the Center
- Apply a generous amount of glue to the flat bottom side of the domed quilling flower center (created in Step 3).
- Place the center right in the middle of the flower, positioned over the inner bases of the 5 petals. Press down lightly to secure it.
- Apply glue to the flat back of a pearl bead and place it right in the center of the quilling dome.
Step 6: Final Touches (Optional)
- For an extra decorative accent, tightly roll a few dusty rose quilling strips into small loose or tight coils, and glue a few of them (along with a loose pearl bead or two) around the base of the flower, just like in Figure #1.
Finished Product: The completed paper flower will feature a stunning three-dimensional structure combining a light pink petal backing, intricate white lace filigree, and a prominent quilling center topped with a pearl in the middle, exactly matching the reference image.